
The SS3 Type X LED Fog Light Kit provides a major upgrade over factory fog lights. The SS3 pods deliver higher output intensity than any other 3" light on the market, with custom-engineered TIR optics for focused, functional beam patterns. The included bracket and bezel give it a clean, factory-style appearance. Available in 6000K white or 3000K yellow with an optional amber backlight. Here's the full walkthrough.
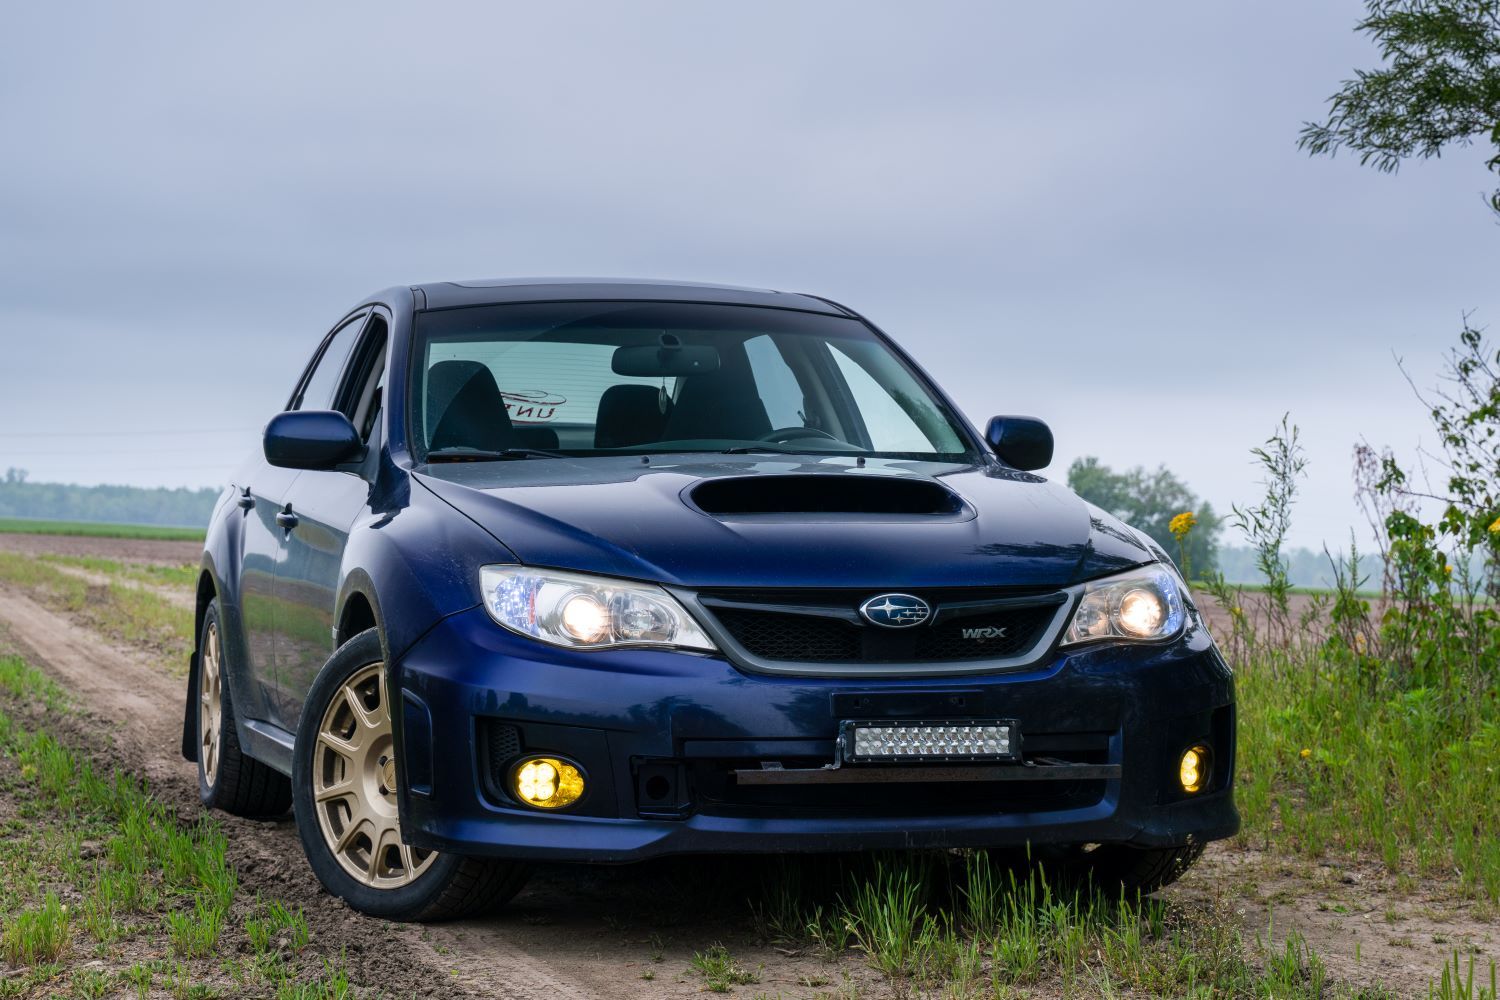
Table of Contents
- Mounting Instructions
- Aiming Instructions
- Questions About the Install?
- Shop SS3 Fog Light Kits at Ess K Customs
Mounting Instructions
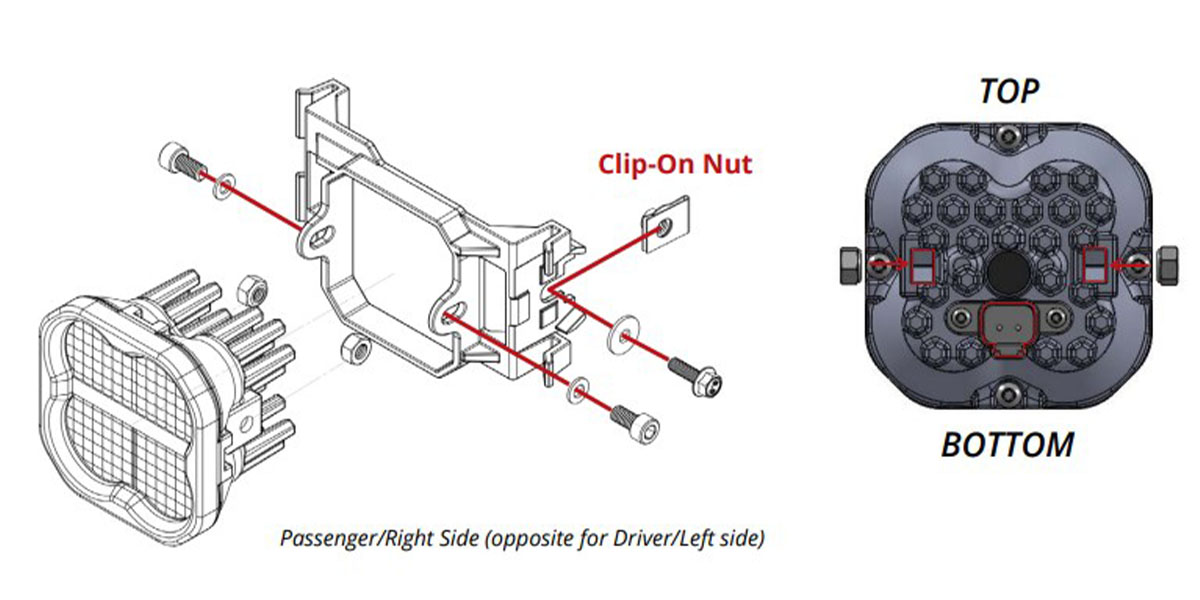
Step 1 — Assemble the SS3 Pod and Bracket
Install the supplied clip-on nut onto the bracket with threads facing toward the SS3 pod. Install the supplied nuts into the pod housing with the nylon facing inward. Attach the bracket to the SS3 pod using the supplied screws and washers — tighten so the pod retains its position but can still pivot for aiming.
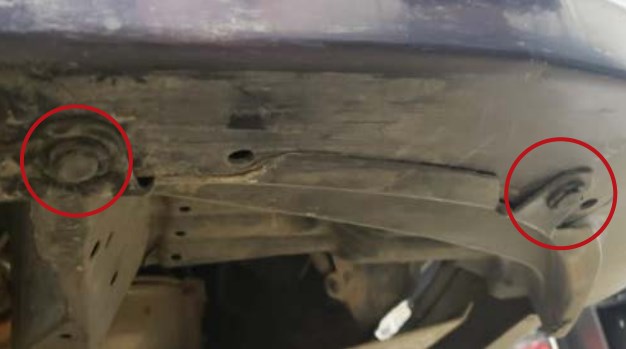
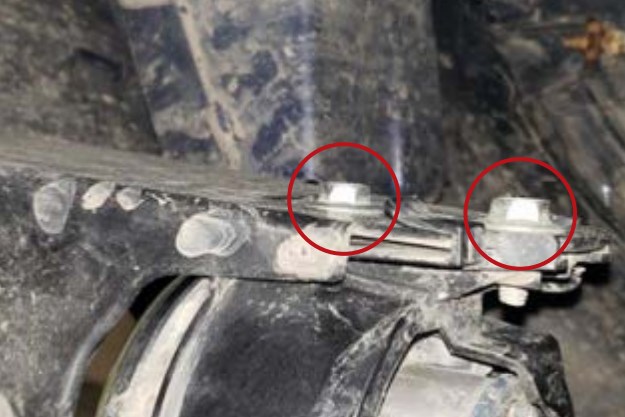
Step 2 — Remove the Factory Fog Light
Starting on the passenger side, remove the two push clips and one 10mm bolt securing the fender liner to the bottom of the bumper. Pull the fender liner back and remove the two 10mm bolts holding the factory fog light. Remove the factory fog light.
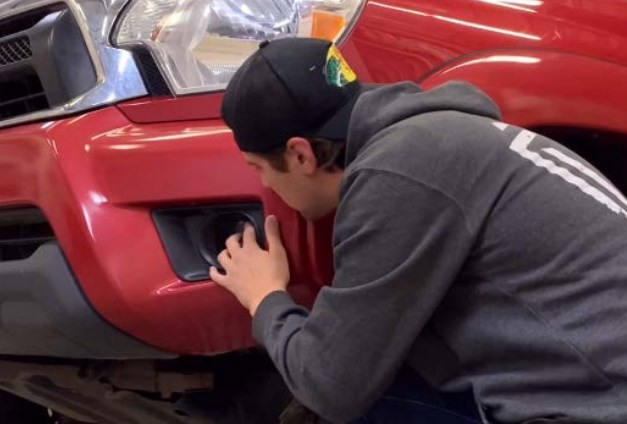
Step 3 — Install the SS3 Fog Light
Install the SS3 LED pod and bezel onto the vehicle using the included 8mm hex bolt. Plug the pod into the factory fog light harness using the included DT wire adapter and test. If the pod doesn't light up, unplug and flip the connector 180 degrees.
Step 4 — Connect Backlight (Optional)
If you purchased backlit SS3 pods, connect the backlight power wire to a fused 12V source (such as parking light or sidemarker) using the included T-taps. Do not connect directly to the battery — the power source must be fused.
Step 5 — Install the Driver Side
Repeat the process on the driver side.
Aiming Instructions
Step 1. Park your vehicle 25 feet from a wall or garage door on a level surface.
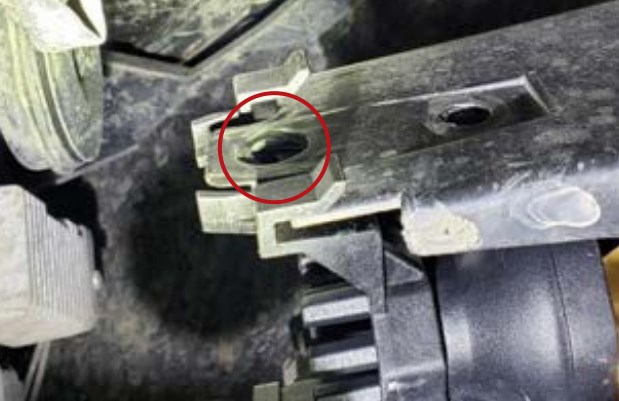
Step 2. Loosen the 5/32" Allen bolts on each side of the SS3 pod just enough to allow adjustment.
Step 3. Measure from the ground to the center of the SS3 pod — this is your mounting height.
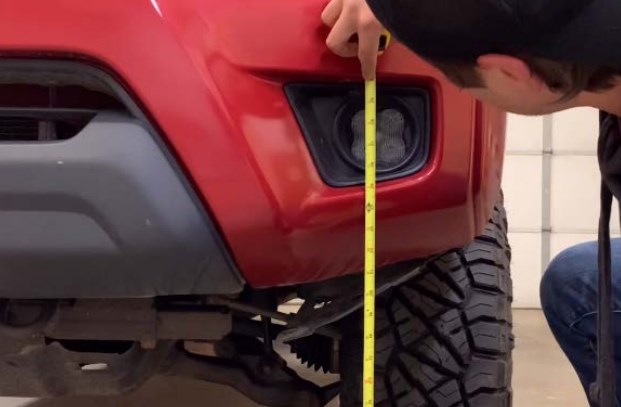
Step 4. Mark the mounting height on the wall with tape, then add another piece of tape four inches below — this is your fog cut-off line.
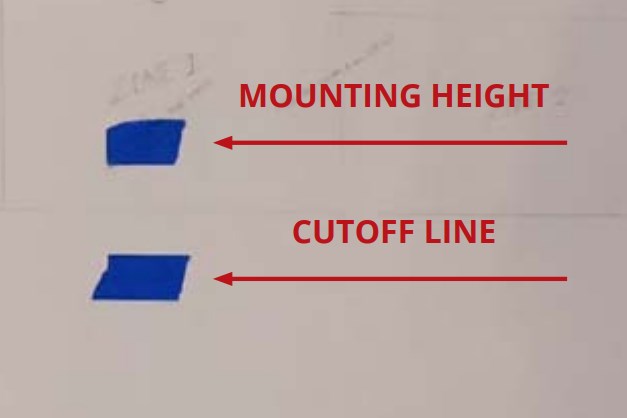
Step 5. Aim each SS3 pod so the top of the beam pattern is on the cut-off line. Tighten the Allen bolts back down — do not overtighten or use power tools.
Step 6. Secure the fender liner to the bumper using the original hardware. The install is complete.
Questions About the Install?
If you run into any issues during the installation, contact Ess K Customs — as an authorized Diode Dynamics dealer, we're here to help.
Shop SS3 Fog Light Kits at Ess K Customs
Ready to upgrade your fog lights? As an authorized Diode Dynamics dealer, Ess K Customs carries genuine SS3 Type X Fog Light Kits with full manufacturer warranty.
Browse SS3 Type X Fog Light Kits at Ess K Customs →
This install guide applies to Diode Dynamics SKUs: DD6545, DD6546, DD6547, DD6548, DD6549, DD6550, DD6704, DD6705, DD7129, DD7130, DD7131, DD7132, DD7133, DD7134, DD7135, DD7136