
The SS5 Stealth Grille LED Pod Kit for the 2014-2023 Toyota 4Runner mounts two or four SS5 LED pods behind the front grille for a powerful, clean-looking lighting upgrade. Requires front bumper removal for installation. Here's the full walkthrough.

Table of Contents
- Installation Video
- Tools Required
- Bumper Removal
- Mounting Instructions
- Wiring Instructions
- Questions About the Install?
- Shop 4Runner Lighting at Ess K Customs
Installation Video
Tools Required
- Plastic trim removal tool
- 5/16" ratchet
- 10mm and 14mm sockets
- 4mm Allen key
Bumper Removal
Step 1 — Remove Front Bumper
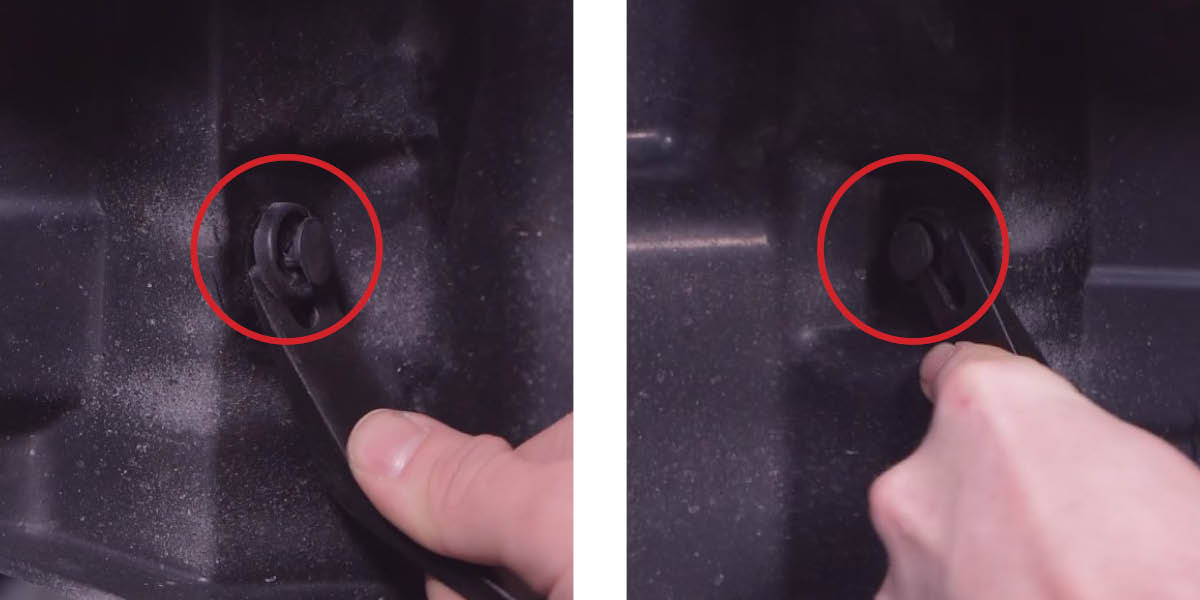
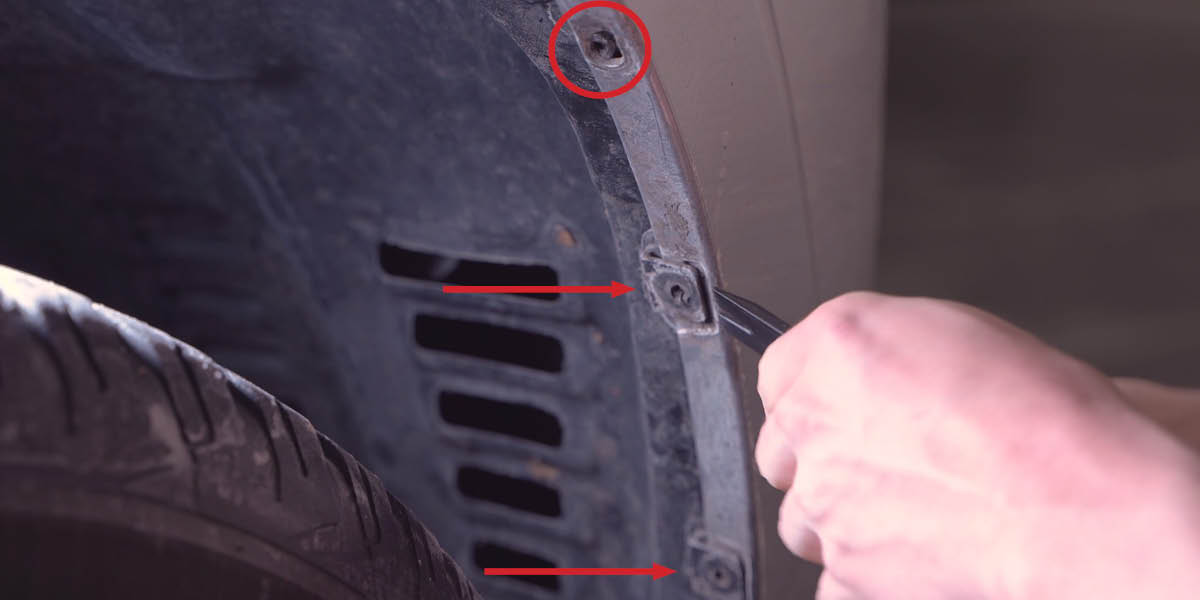
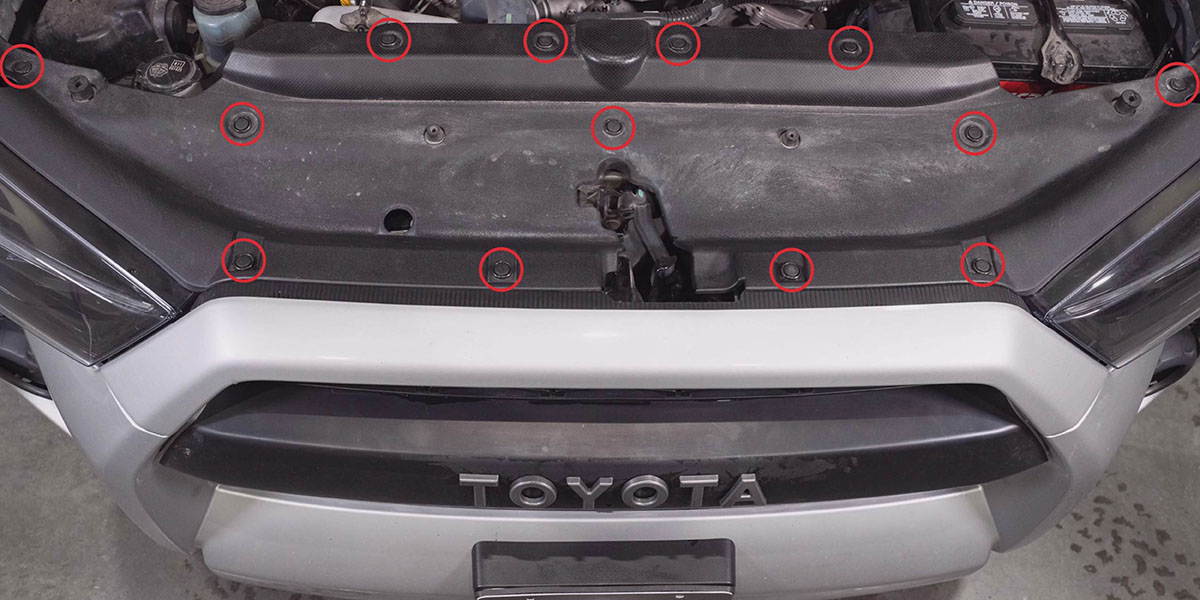
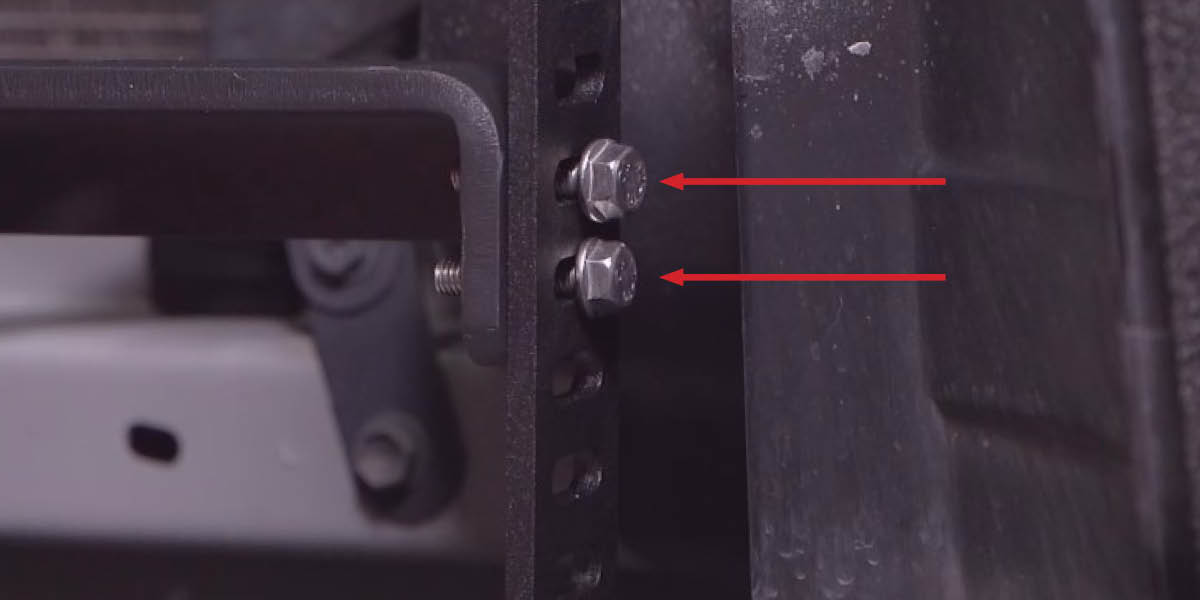
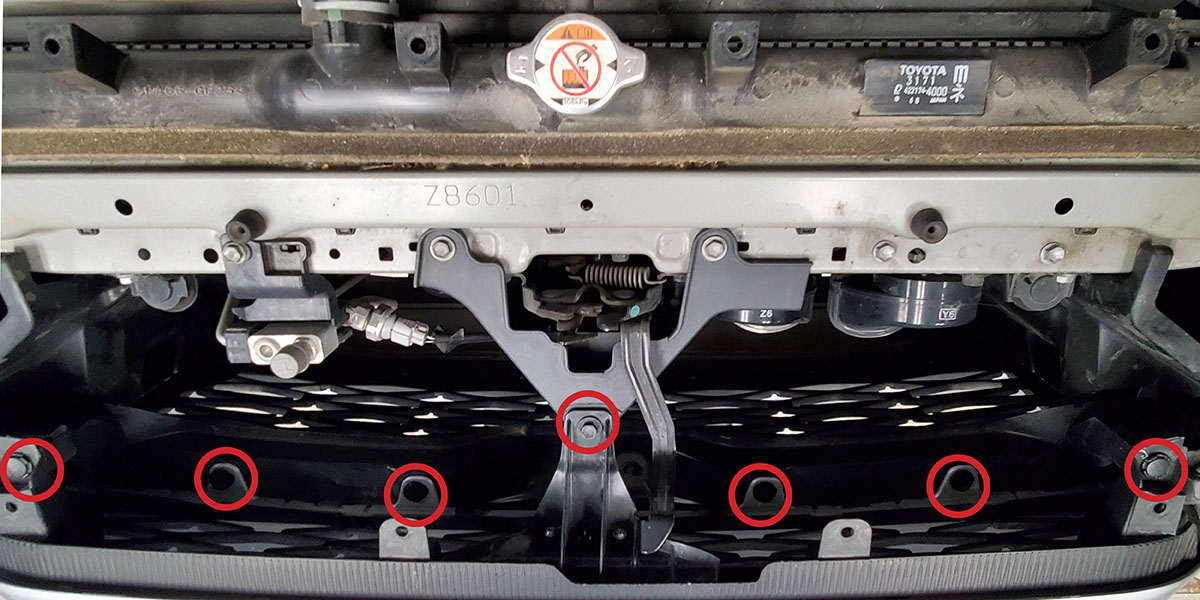
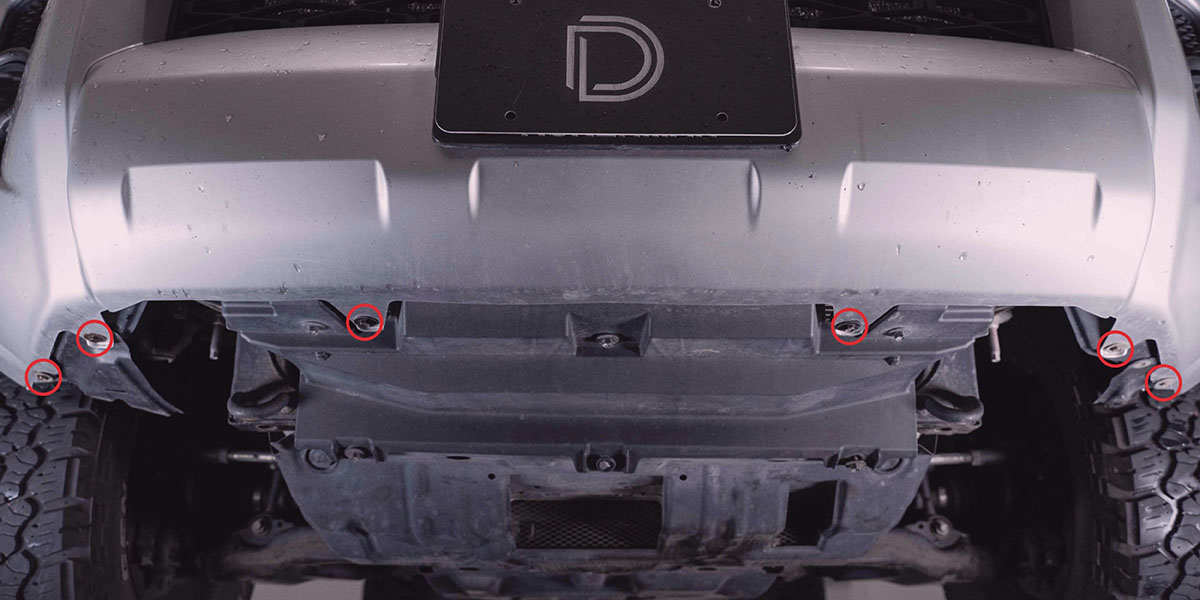
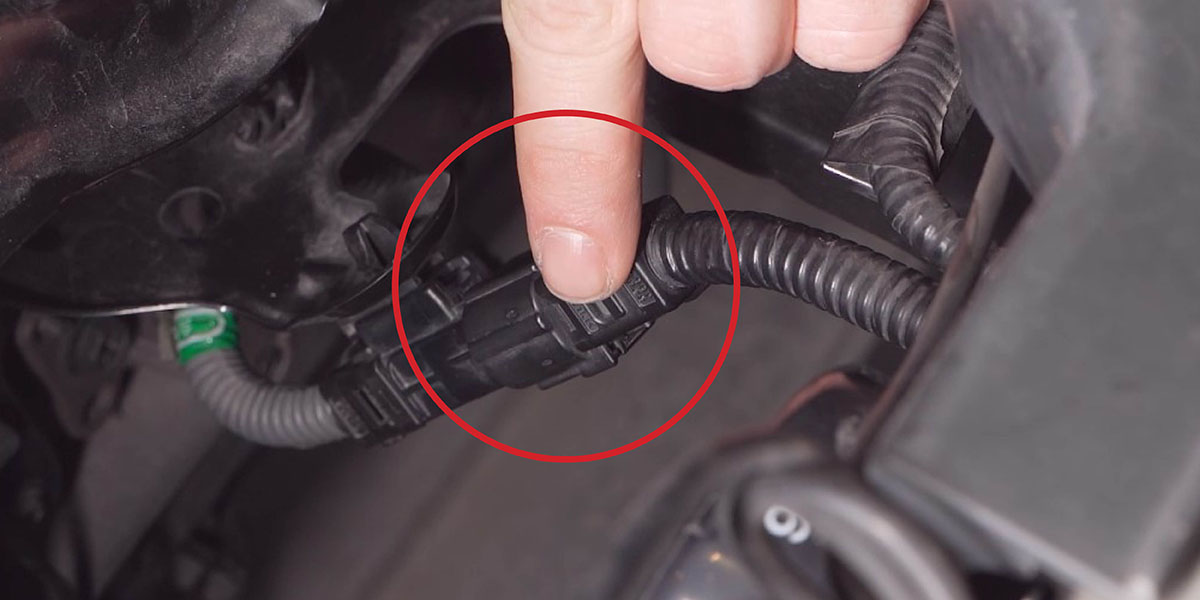
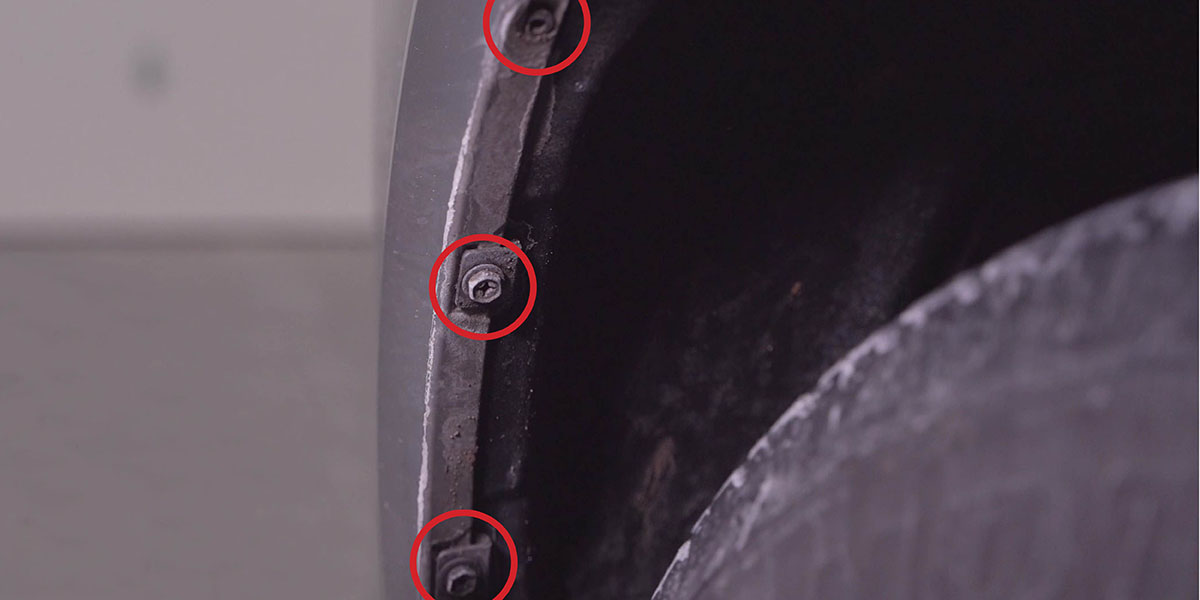
Pop the hood and remove the thirteen push rivets holding the core support trim panel. Remove the six plastic push rivets from the top of the grille and the center 10mm bolt. From underneath, remove the six 10mm screws along the bottom of the bumper and disconnect the factory fog lights. If equipped, disconnect the Toyota Safety Sense module connector under the hood latch and remove its two 10mm bolts. On each side, remove the three 10mm screws from the wheel well edge, use a trim tool to release the upper bumper snap, and pull the corner away from the fender. With a second person, pull the bumper straight forward to release headlight snaps and remove.

Mounting Instructions
Step 2 — Install Brackets
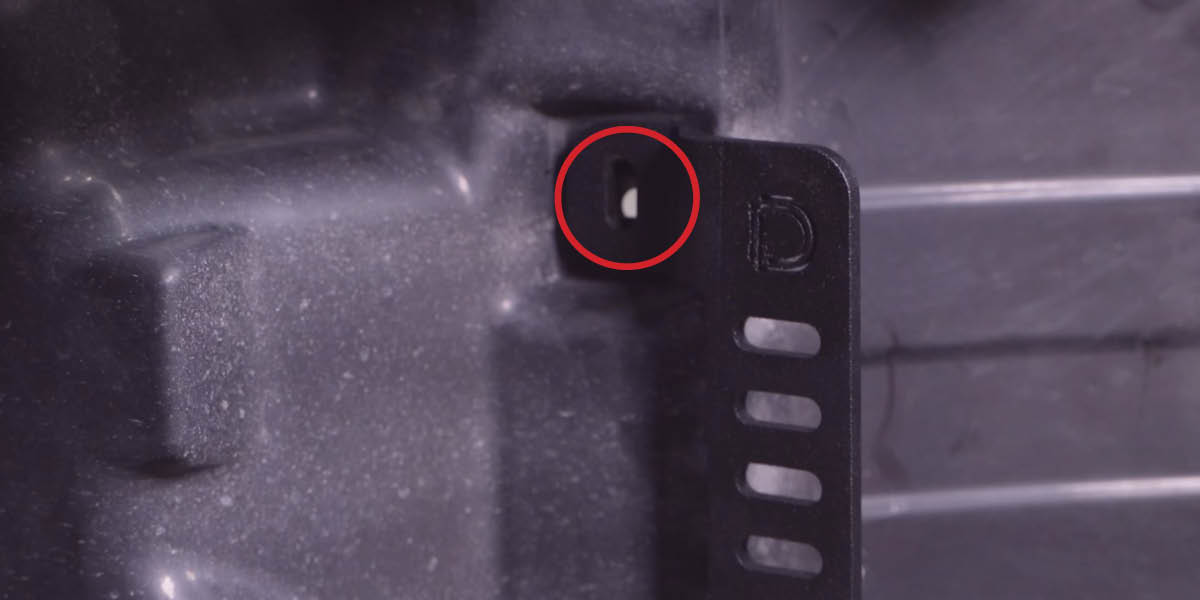
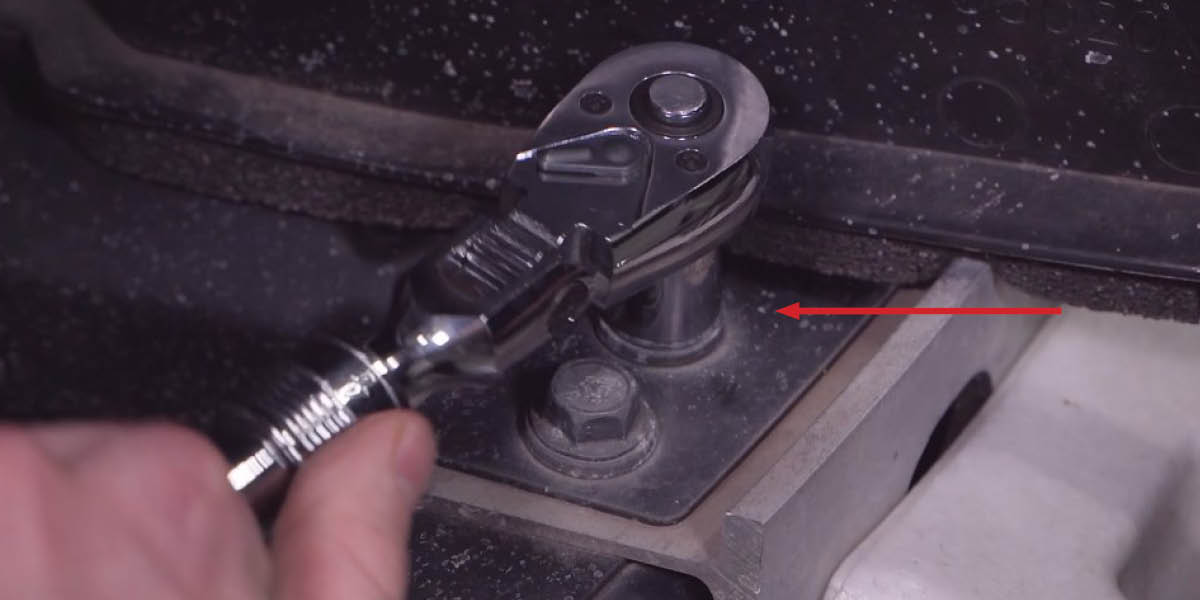
Remove the push rivet from the air dams on both sides (do not remove the air dams). Using a 14mm socket, loosen the center bolt on the crash bar. Slide the bracket's open slot under the loosened bolt — open slot faces outward, tab at top faces inward. Loosely secure the brackets to the air dams with the provided M6 hardware. Secure the SS5 crossbar bracket in the 4th and 5th slotted holes from the bottom, centered on the Stage Series brackets. Tighten all bracket hardware and torque the 14mm bolt to 22 ft-lbs.
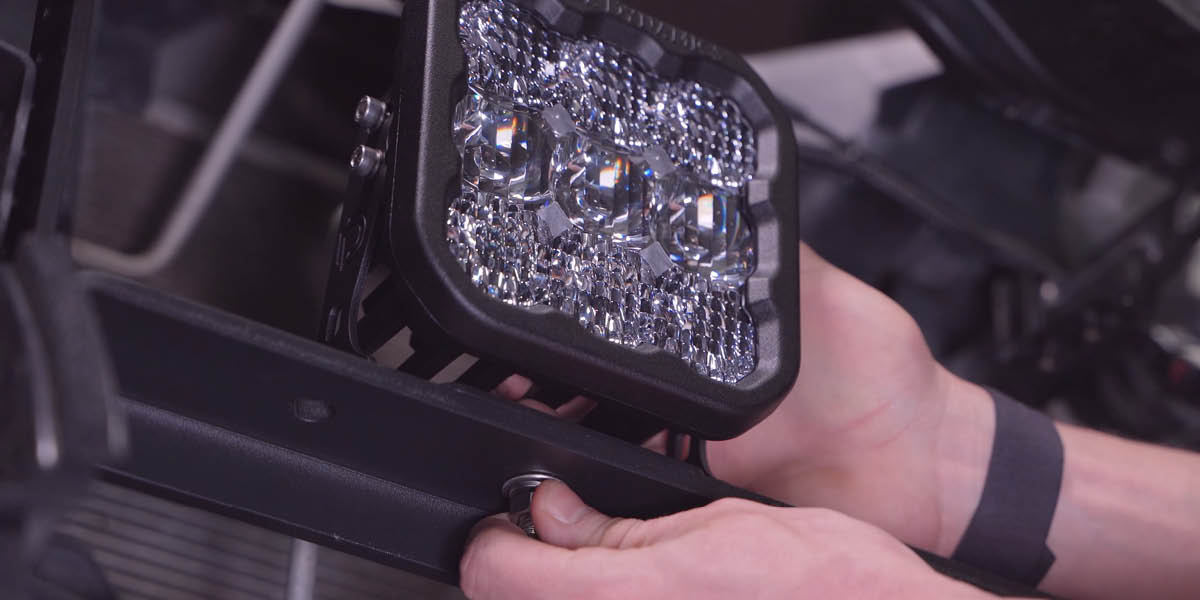
Step 3 — Mount SS5 Pods
Attach the SS5 universal brackets to the crossbar bracket. Recommended placements: four pods in Position A, or two pods in Position A or B. (If no Toyota Safety Sense, an additional SS5 can mount in Position C, sold separately.) Loosely secure each SS5 pod onto the universal brackets.


Wiring Instructions
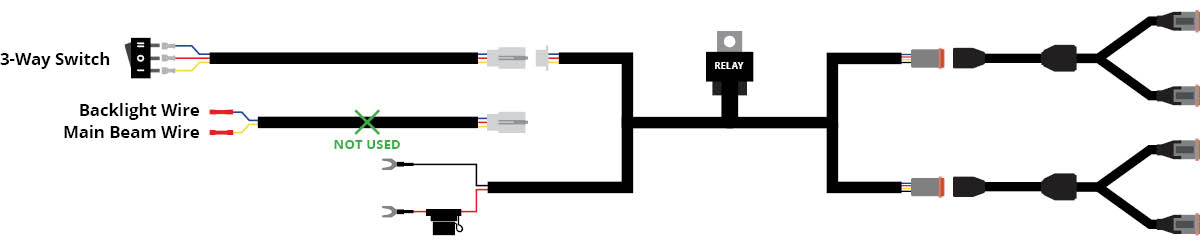
Step 4 — Route and Connect Harness
Route the included wiring harness to the needed locations. Place the relay near the fuse box under the hood and run output wires to the SS5 pods — route behind the driver's side headlight to the battery. For toggle switch control, route the switch wire into the cabin on the driver's side. Connect battery wires to the positive and negative terminals. For 4-pod kits, connect the output wire to each splitter, then to each pod.
Step 5 — Check Fitment and Reinstall Bumper
Loosely set the bumper in place and check SS5 pod fitment — adjust pods further back in the slots if contact occurs. Aim the pods as desired and tighten. Reverse the bumper removal steps to reinstall and complete the installation.
Questions About the Install?
If you run into any issues during the installation, contact Ess K Customs — as an authorized Diode Dynamics dealer, we're here to help.
Shop 4Runner Lighting at Ess K Customs
Looking for lighting upgrades for your 2014-2023 Toyota 4Runner? As an authorized Diode Dynamics dealer, Ess K Customs carries genuine products with full manufacturer warranty.
Browse 4Runner SS5 Stealth Grille Kits at Ess K Customs →
This install guide applies to Diode Dynamics SKUs: DD7534-DD7550