
The SS3 Type M/MR LED Fog Light Kit replaces your factory fog lights with SS3 LED pods for dramatically higher output and a clean, factory-style look. Fits a wide range of Mopar vehicles including Jeep Wrangler, Gladiator, and more. Available in cool white or selective yellow with optional amber backlight. Here's the full walkthrough.

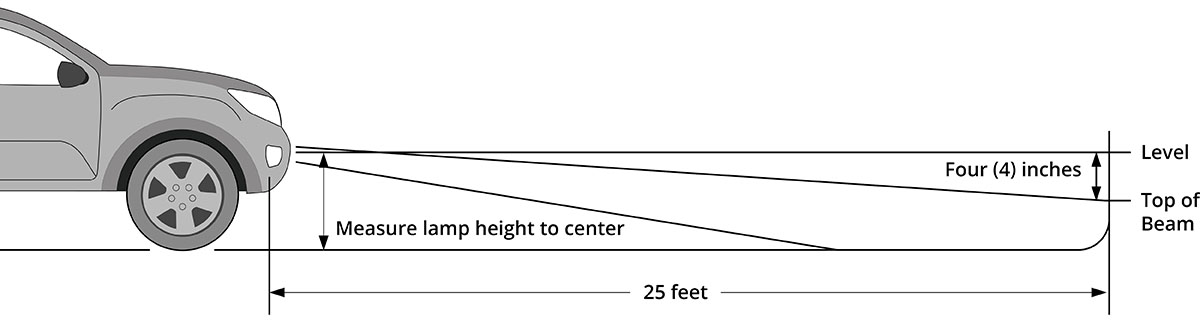
Table of Contents
- Installation Video
- Tools Required
- Installation Instructions
- Aiming Instructions
- Questions About the Install?
- Shop LED Fog Lights at Ess K Customs
Installation Video
Tools Required
- 5/32" Allen key
- Tape measure
- Tape
Installation Instructions
Step 1 — Mount the Pods in Brackets
Install the supplied nuts into the pod housing with the nylon facing inward. Attach the bracket to the pod using the supplied screws and washers in the correct orientation. Tighten so the pod holds its position but can pivot for aiming.
Note for metal bumper vehicles (Type MR): Attach the included steel Type MR bracket to the back of the plastic Type M bracket using the included hardware. The second steel bracket attaches to the opposite side of the other lamp — when finished, one lamp should have a steel bracket on the right side and the other on the left.
Step 2 — Remove the Factory Fog Lights
Access your factory fog lights and disconnect the fog light connector from the vehicle wiring harness. Remove the factory fog light housing. The factory hardware will be reused.
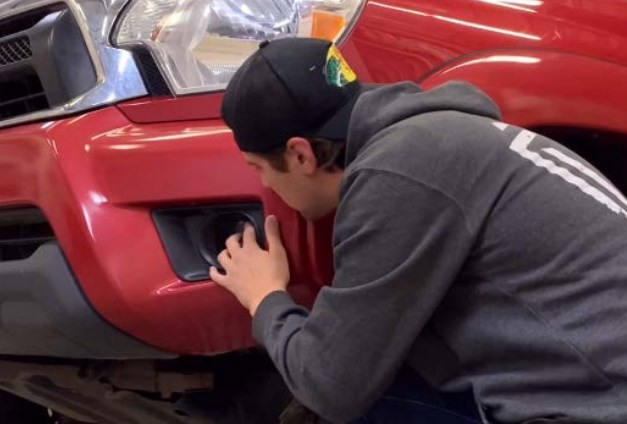
Step 3 — Install the New Fog Lights
Install the new SS3 pod using the factory hardware. The tabs and holes on the bracket should align with the factory mounting points. Reuse the factory hardware and tighten securely. Use the included wire adapters to connect the pod to the vehicle wiring harness and test for functionality (if the light doesn't turn on, flip the connector 180 degrees). For backlit pods, connect the included 2-pin to 4-pin adapter wire in-line, then connect the backlight wire to a fused 12V source using the included T-taps. Repeat on the other side.
Aiming Instructions
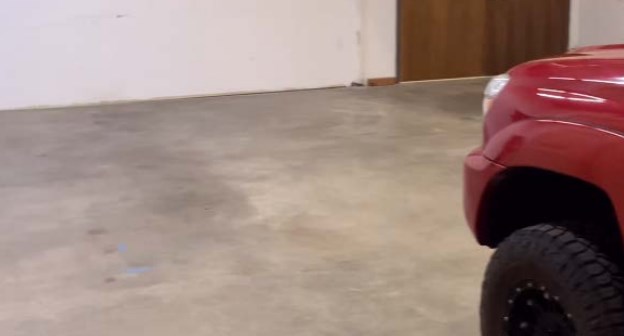
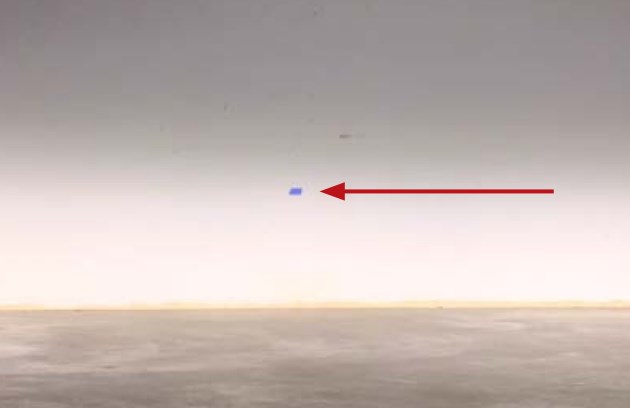
Step 1 — Park 25 feet from a wall on a level surface.
Step 2 — Loosen the 5/32" Allen bolts on each SS3 pod just enough to allow adjustment.
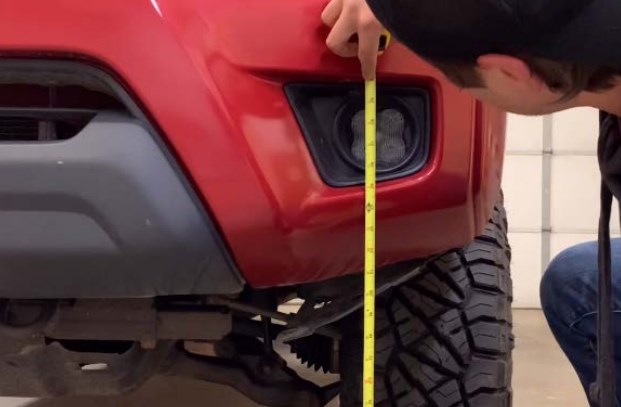
Step 3 — Measure the distance from the ground to the center of the SS3 pod (mounting height).
Step 4 — Mark the mounting height on the wall with tape.
Step 5 — Add a second tape mark four inches below (fog light cutoff line).
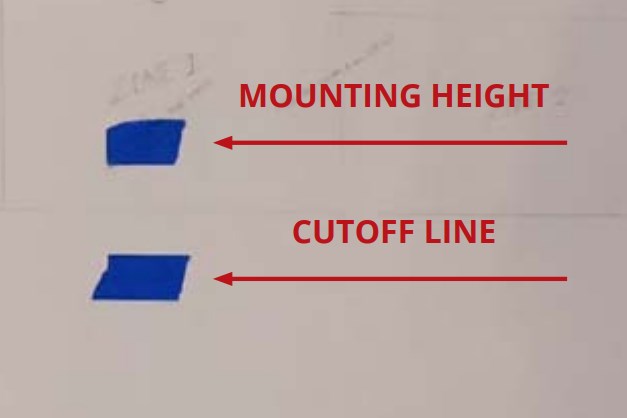
Step 6 — Aim each SS3 pod so the top of the beam pattern aligns with the cutoff line.
Step 7 — Tighten the Allen bolts. Do not overtighten or use power tools. The install is complete.
Questions About the Install?
If you run into any issues during the installation, contact Ess K Customs — as an authorized Diode Dynamics dealer, we're here to help.
Shop LED Fog Lights at Ess K Customs
Ready to upgrade your fog lights? As an authorized Diode Dynamics dealer, Ess K Customs carries genuine SS3 fog light kits with full manufacturer warranty.
Browse SS3 Fog Light Kits at Ess K Customs →
This install guide covers a wide range of Diode Dynamics SS3 Type M and Type MR fog light SKUs