
The TRD Pro Grille Lightbar Kit for the 2022-2026 Toyota Tundra adds powerful forward-facing LED lighting while maintaining a factory-style appearance behind the TRD Pro grille. Here's the full step-by-step breakdown to get it installed on your Tundra.

Table of Contents
- Tools Required
- Installation Instructions
- Questions About the Install?
- Shop Tundra Grille Light Bar Kits at Ess K Customs
Tools Required
- Ratchet
- 10mm socket
- 12mm socket
- T6 Torx driver
- Phillips screwdriver
- Trim removal tools
Installation Instructions
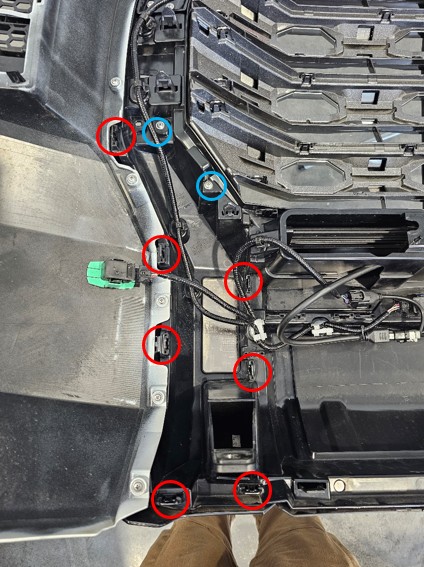
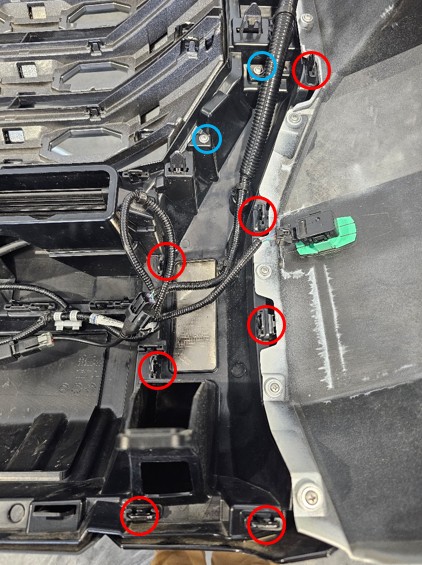
Step 1 — Open the hood. Using a 10mm socket, remove the four bolts securing the top of the bumper. Use a trim tool to remove the two push clips, then disconnect the four harness connectors near the push clips.
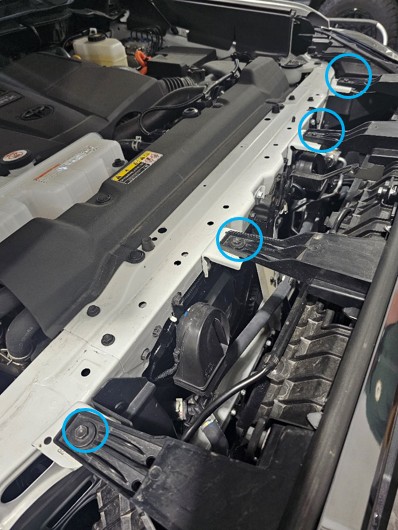
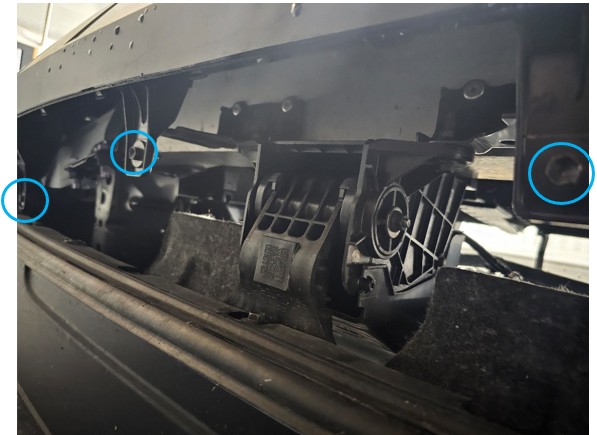
Step 2 — From underneath the bumper, remove the four 10mm bolts securing the lower portion of the bumper.
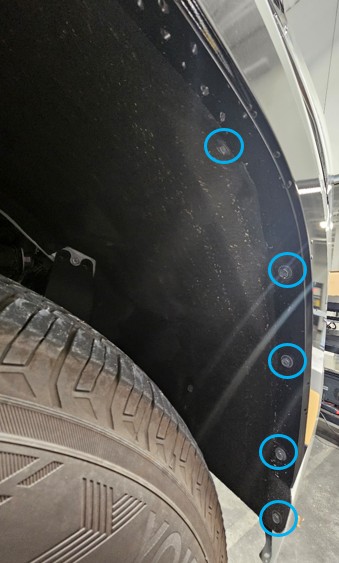
Step 3 — Remove the five 10mm bolts inside each wheel well. Peel back the fender liner to access the bumper clips.
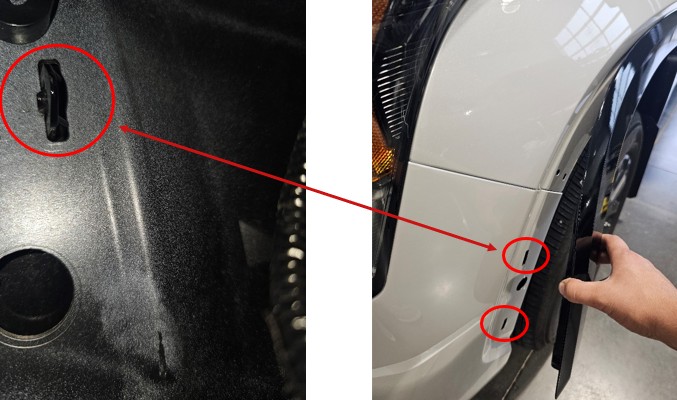
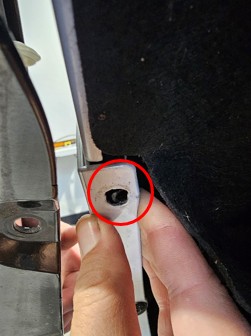
Step 4 — Reach inside the wheel well and release the two clips securing the fender flare to the bumper. Gently pull the flare away from the bumper. Repeat on the opposite side.
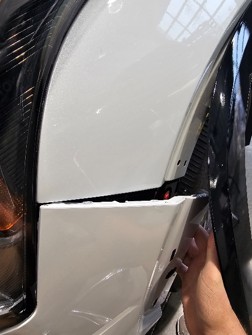
Step 5 — Starting at the wheel well, pull the bumper away from the vehicle and work toward the center. Once released, remove the bumper and place it face down on a padded surface.
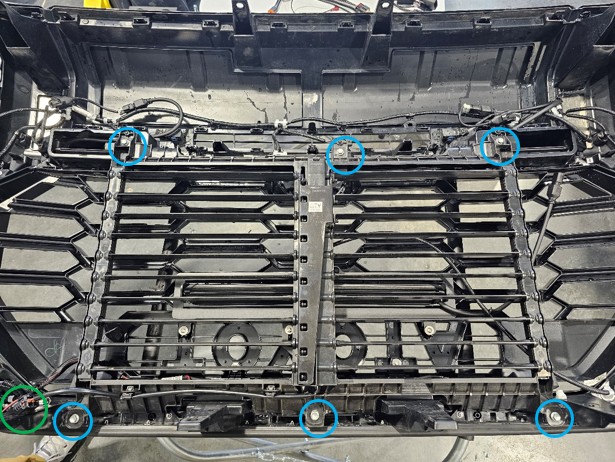
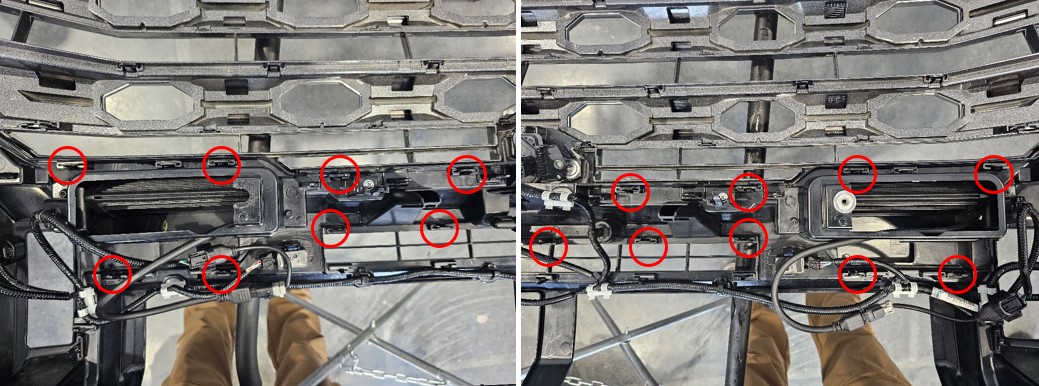
Step 6 — Remove the six 10mm bolts securing the active grille shutter. Disconnect the harness and set the shutter aside.
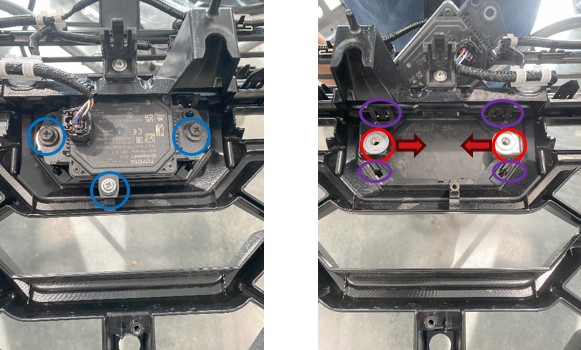
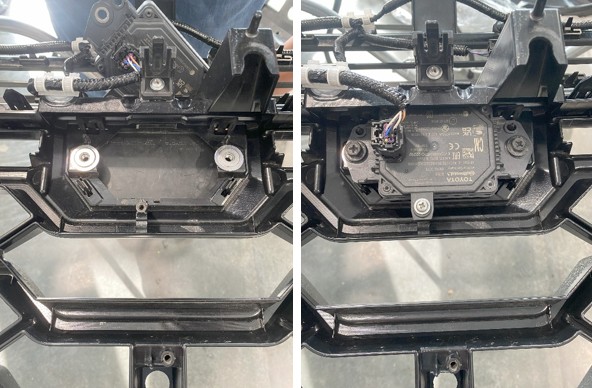
Step 7 — Remove the two bolts and one Phillips screw securing the radar sensor. Remove the slide nuts and release the clips on the radar sensor cover. Set all components aside for reinstallation.
Step 8 — Remove the two Phillips screws securing the camera bracket. Note the camera orientation for reinstallation.
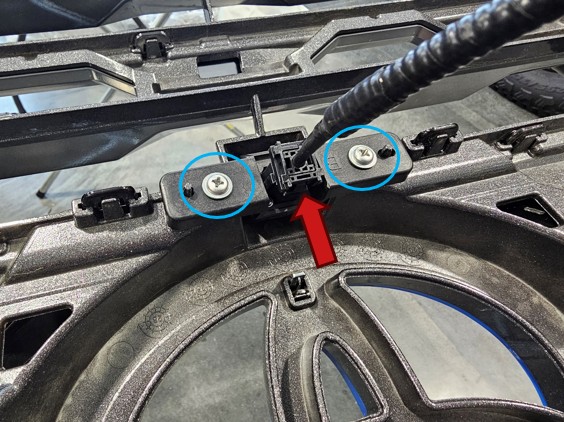
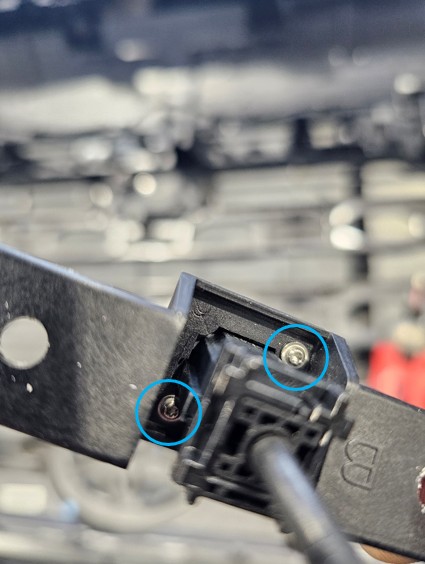
Step 9 — Disconnect the camera harness and remove the two T6 Torx screws to separate the camera from the OE mount.
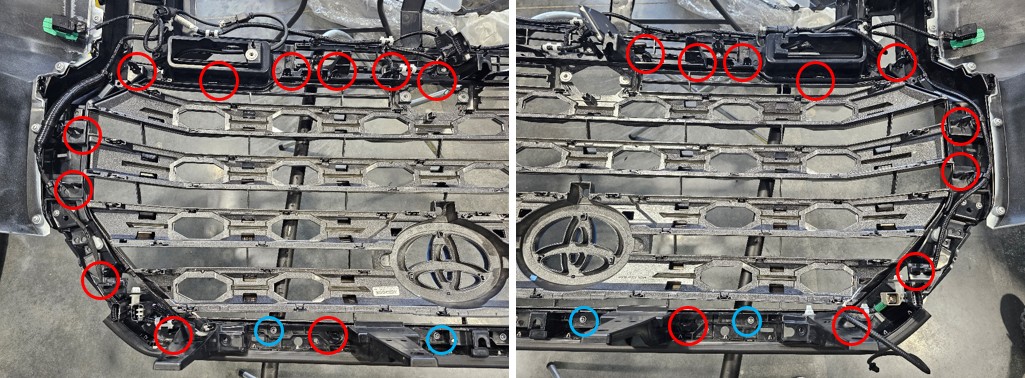
Step 10 — Remove the four Phillips screws and release the clips securing the top grille surround. Support the panel as the final clips are released.
Step 11 — Remove the two Phillips screws and release the clips securing the left grille surround.
Step 12 — Remove the two Phillips screws and release the clips securing the right grille surround.
Step 13 — Release all clips securing the lower grille surround and remove it from the bumper.
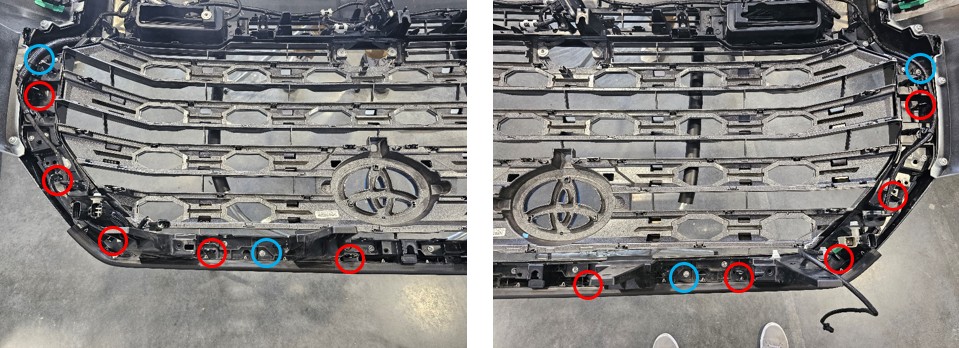
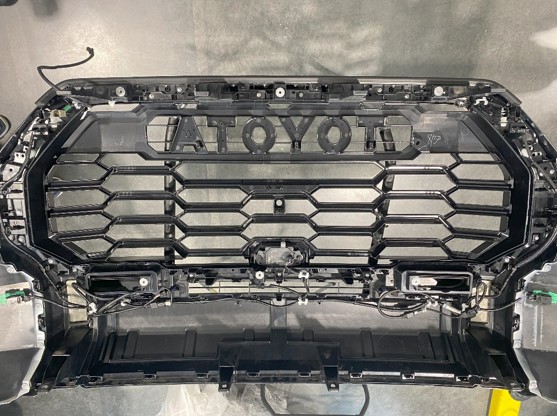
Step 14 — Remove the four Phillips screws and release the remaining clips to remove the factory grille.
Step 15 — Install the TRD Pro grille by reversing the previous step. Ensure all clips are fully seated and reinstall the screws.

Step 16 — Reinstall the radar sensor and cover using the factory hardware and slide nuts.
Step 17 — Reinstall the grille surrounds in the following order: lower surround, left surround, right surround, then top surround.
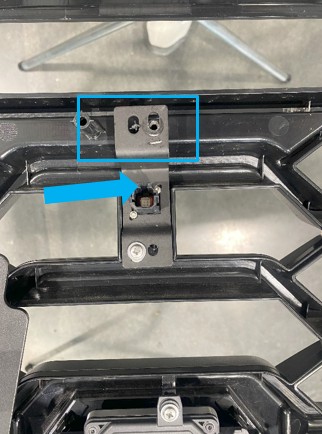
Step 18 — Install the camera onto the Diode Dynamics camera relocation mount using the original T6 screws. Ensure the locking tab is oriented correctly before securing it into the grille.
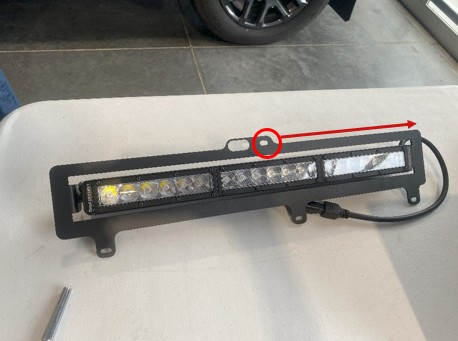
Step 19 — Using the supplied hardware, install the light bar into the grille mounting bracket with the harness oriented toward the keyhole side of the bracket. Slide the light bar fully forward in the bracket and lightly secure it — final tightening comes later. NOTE: This applies to both the classic SS18 and the new Stage Series SS20 Light Bar. The SS20 uses an updated internal design, but the mounting location and procedure are the same.
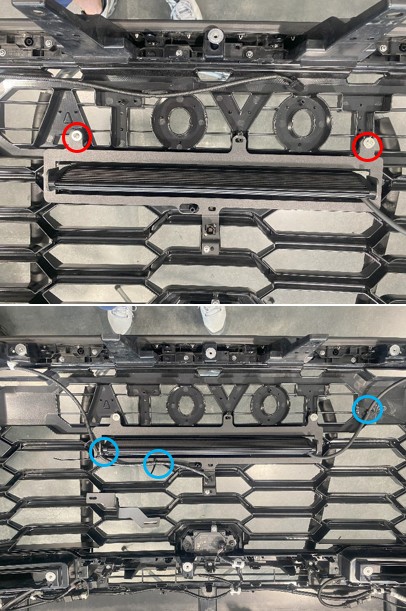
Step 20 — Secure the grille bracket to the TRD Pro grille using the supplied screws and washers. Do not overtighten.
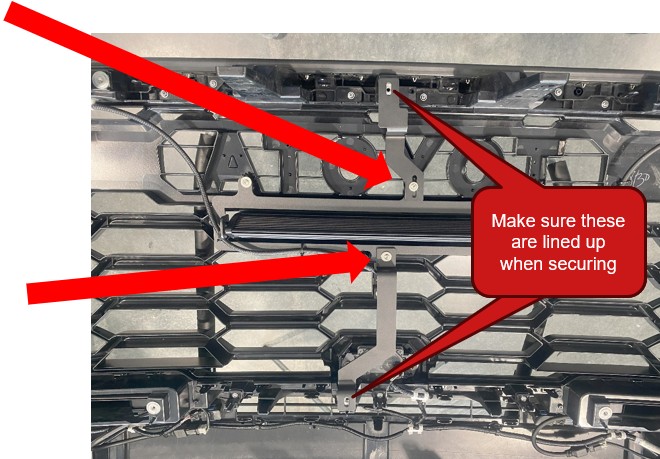
Step 21 — Install the upper and lower support brackets to the light bar bracket using the supplied hardware. Ensure all brackets are properly aligned before tightening.
Step 22 — Route the light bar harness along the grille and secure it using the provided zip ties.
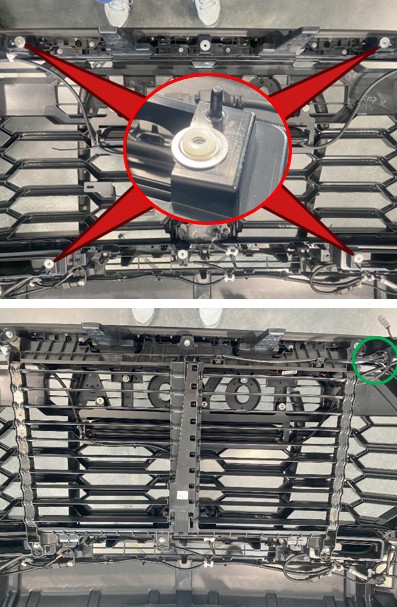
Step 23 — Install the active grille shutter using the supplied spacers and reverse the removal process. Reconnect the harness.
Step 24 — Carefully reinstall the bumper by reversing the bumper removal steps.
Step 25 — Install the wiring harness following the instructions for your specific model:
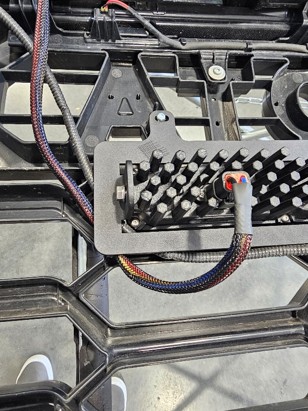
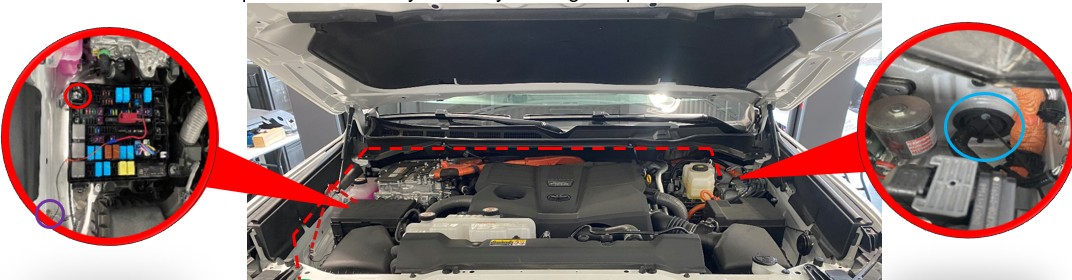
Hybrid Models: Remove the fuse cover to access the positive terminal. Using a 12mm socket, remove the positive terminal nut, place the positive ring connector (red) on the terminal, and re-secure the nut. Use a 10mm socket to remove the ground terminal bolt, place the ground ring connector (black) on the terminal, and re-secure the bolt. Run the DT output lead to the front passenger side and plug it into the lightbar connector. Run the switch lead to the grommet on the front driver side next to the brake booster. Zip tie the harness away from any moving components.
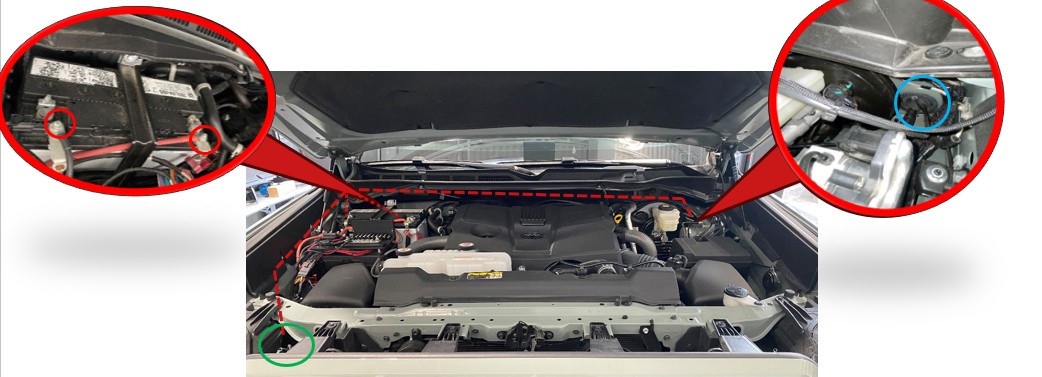
Non-Hybrid Models: Using a 12mm socket, remove the nuts at the battery terminals. Place the positive ring connector (red) on the positive terminal and the ground ring connector (black) on the negative terminal. Re-secure the nuts. Run the DT output lead to the front passenger side and plug into the lightbar connector. Run the switch lead to the grommet on the front driver side next to the brake booster. Zip tie the harness away from any moving components.
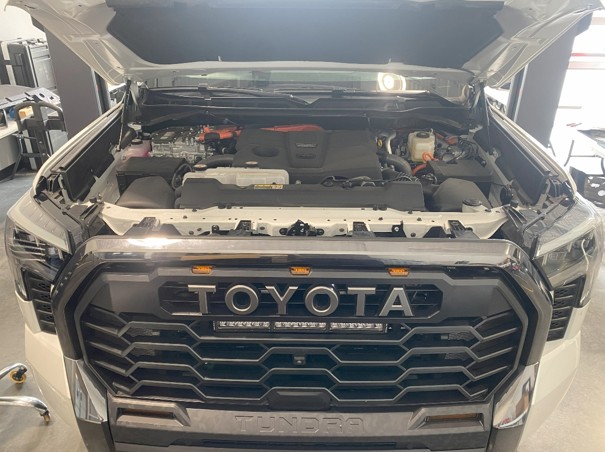
Step 26 — Turn on the light bar, aim it to the desired position, and tighten the mounting hardware using a 10mm socket. Make sure the light bar is fully forward in the bracket to avoid interference with the active grille shutter. The install is complete.

Questions About the Install?
If you run into any issues during the installation, contact Ess K Customs — as an authorized Diode Dynamics dealer, we're here to help.
Shop Tundra Grille Light Bar Kits at Ess K Customs
Ready to upgrade your Tundra with a TRD Pro Grille Lightbar Kit? As an authorized Diode Dynamics dealer, Ess K Customs carries genuine products with full manufacturer warranty.
![]()
Shop TRD Pro Grille Lightbar Kit for 2022-2026 Toyota Tundra →
This install guide applies to Diode Dynamics SKUs: DD7415, DD7416, DD7424, DD7425, DD8700, DD8666, DD8701, DD8667, DD8698, DD8664, DD8699, DD8665, DD8690