
The Stage Series LED Grille Kit for the 2014-2018 Polaris RZR XP mounts two SS3 LED pods on a stainless steel grille — no cutting or drilling required. The lower mounting position cuts through dust and fog for better visibility in tough conditions. Here's the full walkthrough.
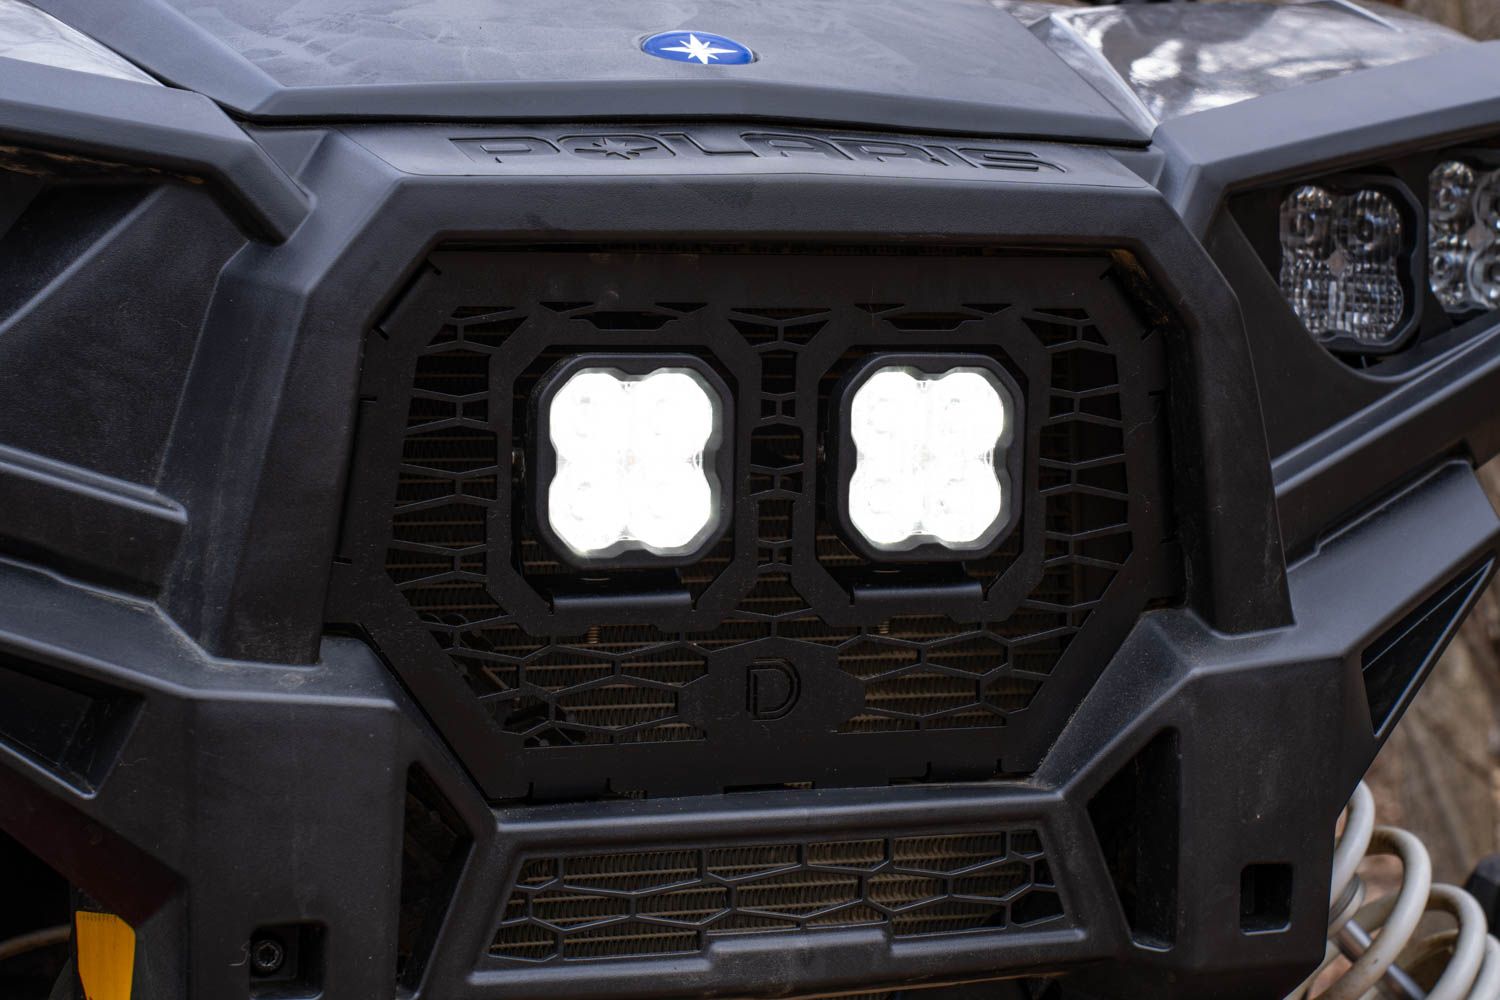
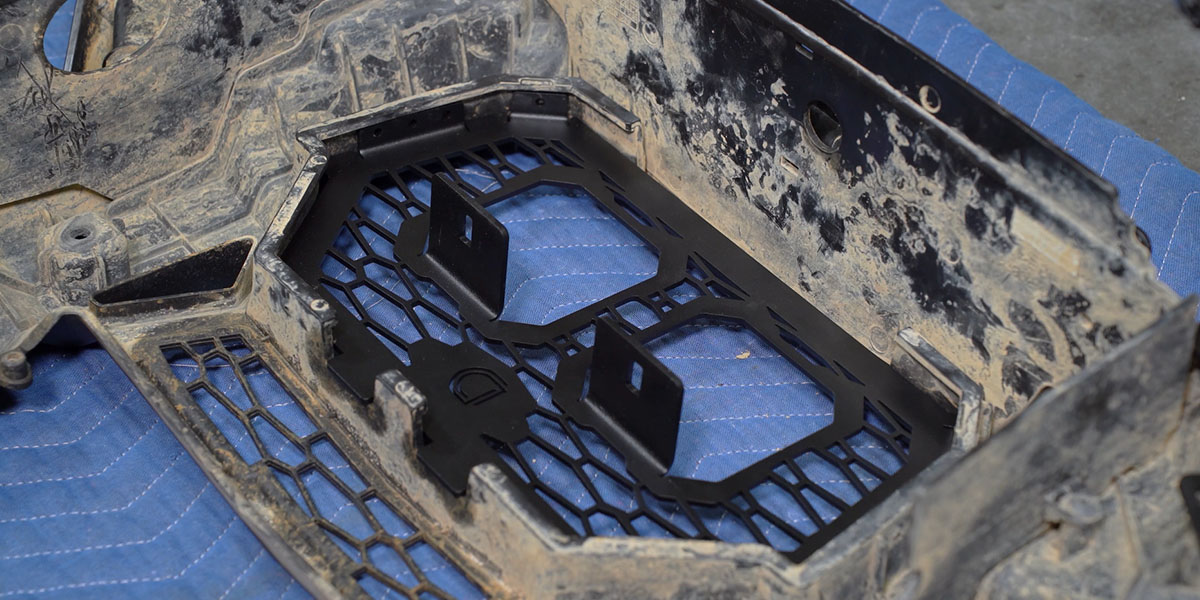
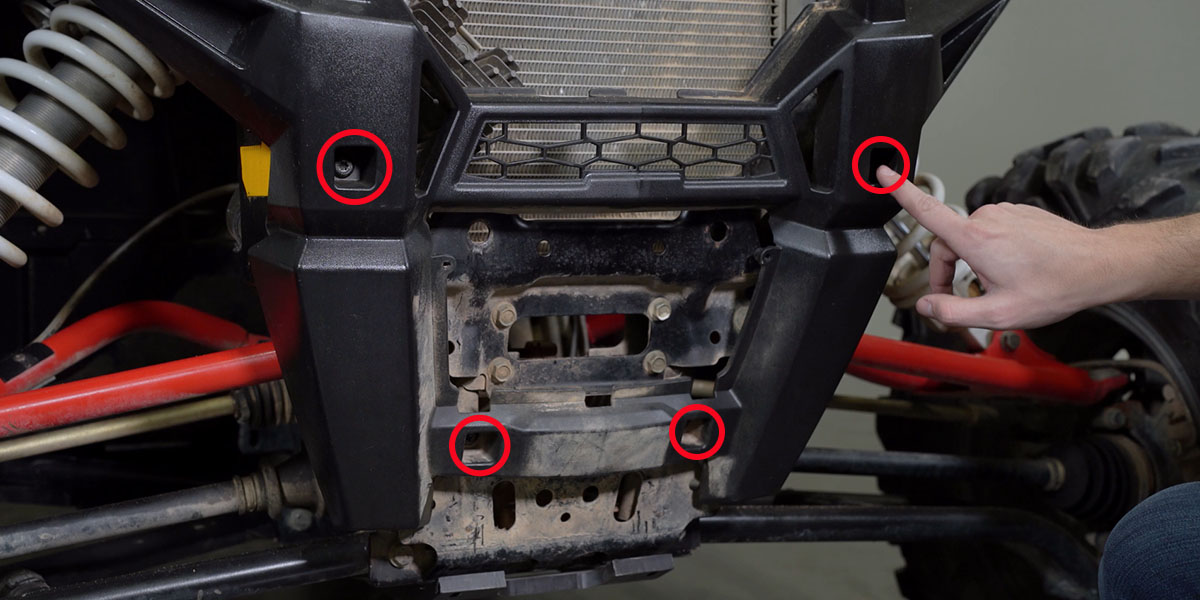
Table of Contents
- Installation Video
- Tools Required
- Mounting Instructions
- Wiring Instructions
- Questions About the Install?
- Shop RZR Lighting at Ess K Customs
Installation Video
Tools Required
- T40 Torx bit
- Basic hand tools
Mounting Instructions
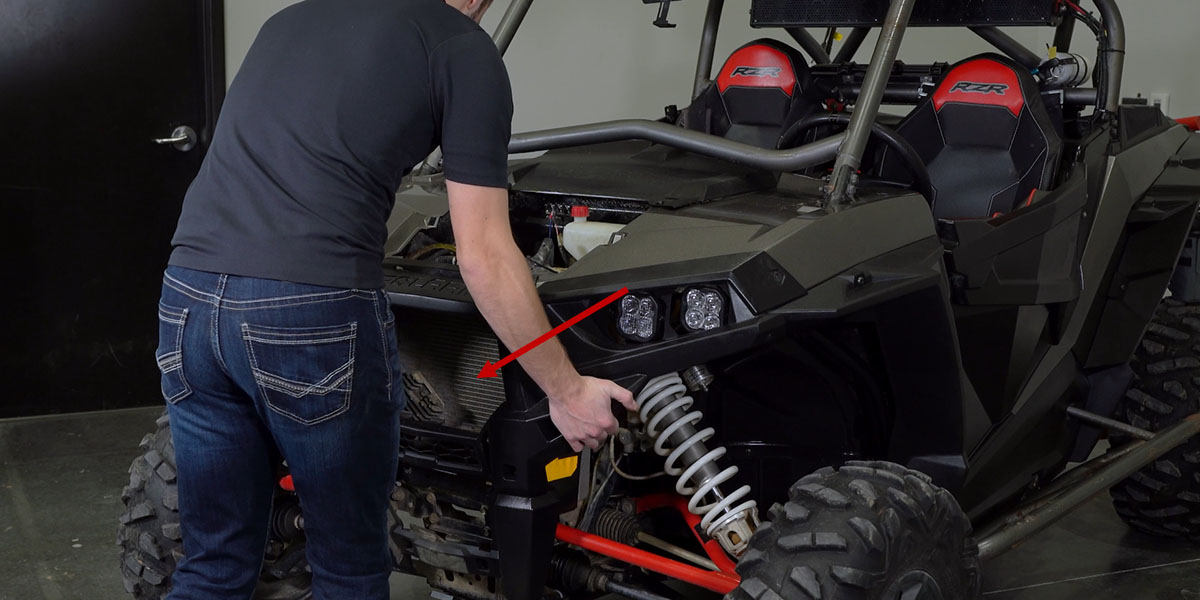
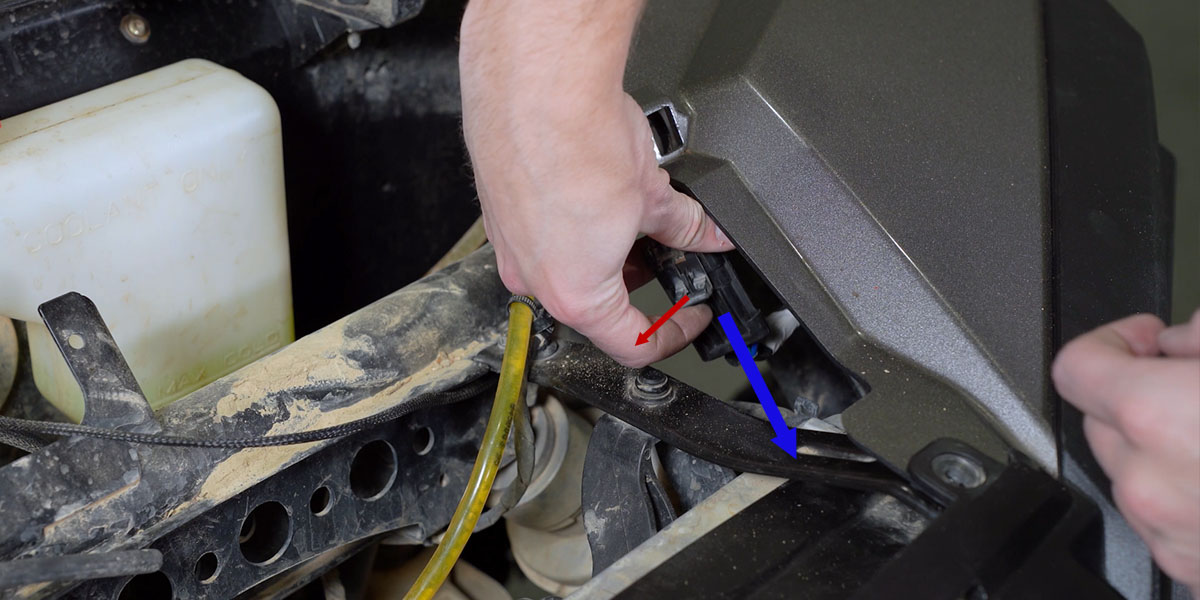
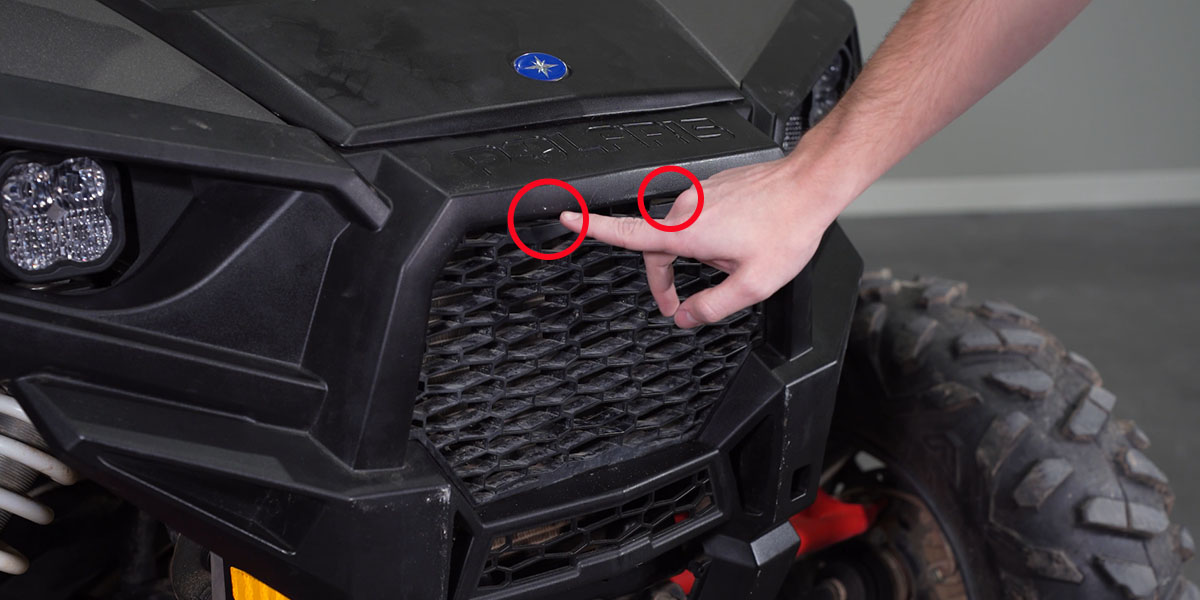
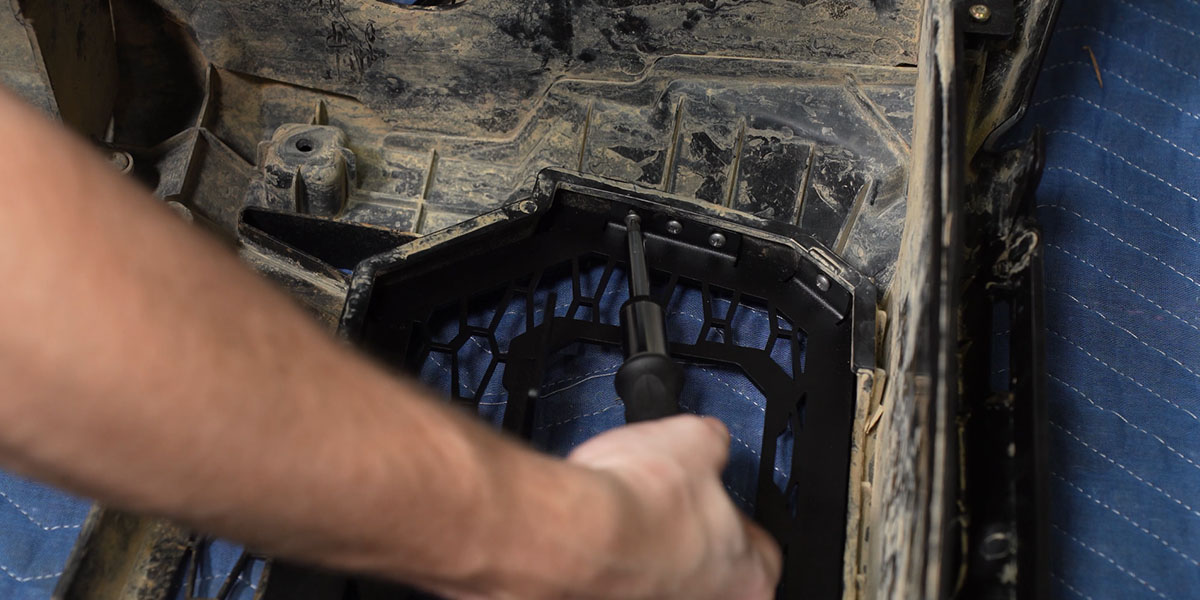
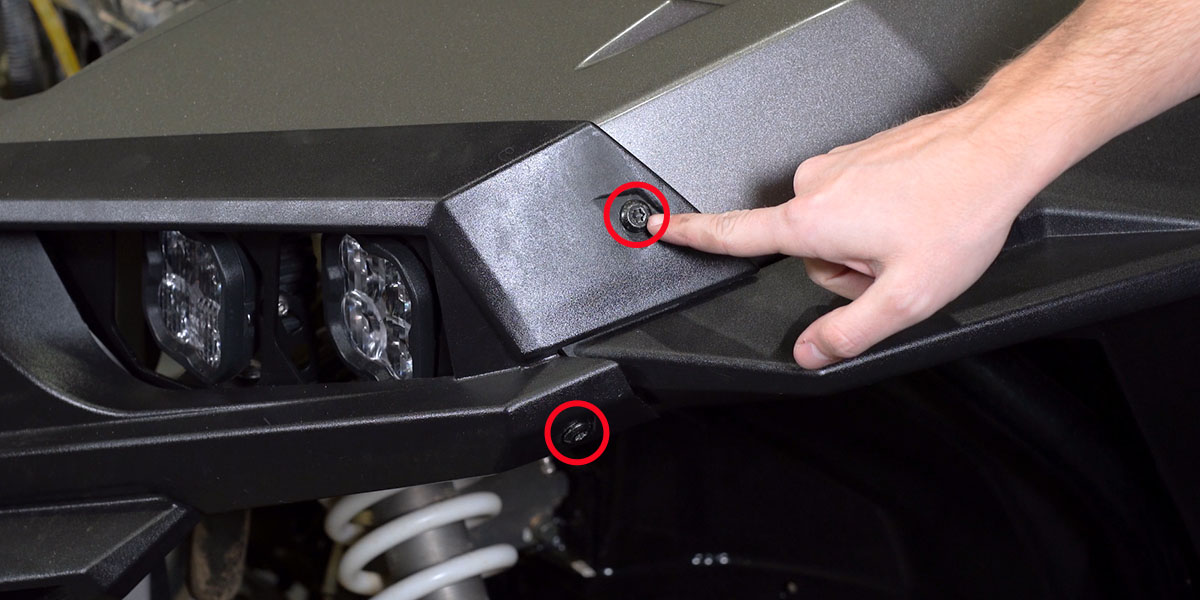
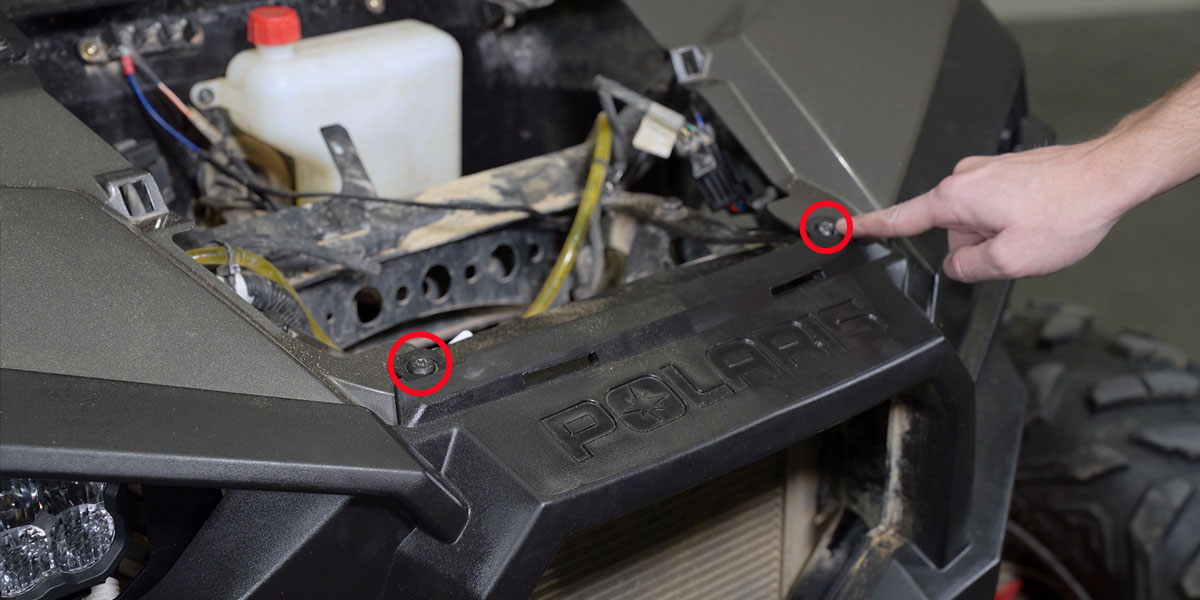
Step 1 — Remove the Front End
Remove the winch cover bolt with a screwdriver and lift off the panel. Push down on the two tabs at the top of the factory grille and pull it away from the bumper. Twist the two hood latches to release and slide the hood off. Using a T40 Torx bit, remove the two fender bolts on each side, then the two front bolts and four additional bolts on the front bumper. Disconnect the headlight harnesses on both sides by pulling the tab away from the connector. Carefully pull the front bumper straight off the vehicle.
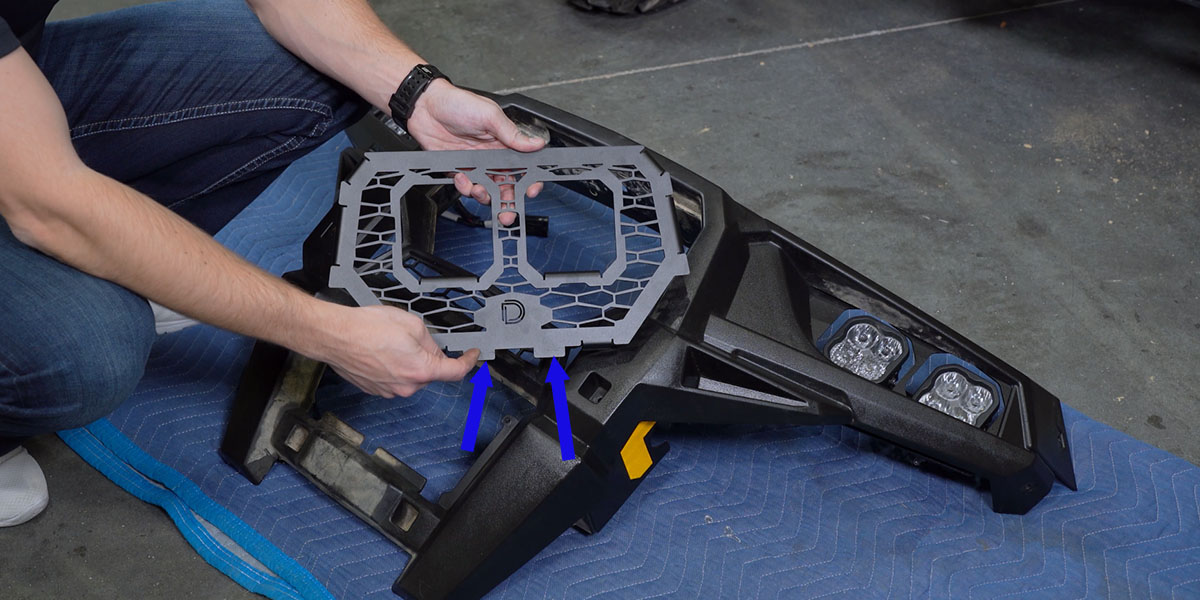
Step 2 — Install the New Grille
Insert the new Diode Dynamics stainless steel grille into the bumper using the bottom keys as your guide. Turn the bumper face down on a soft surface and secure the grille with the included ten self-tapping screws using the provided mounting holes. Do not overtighten.
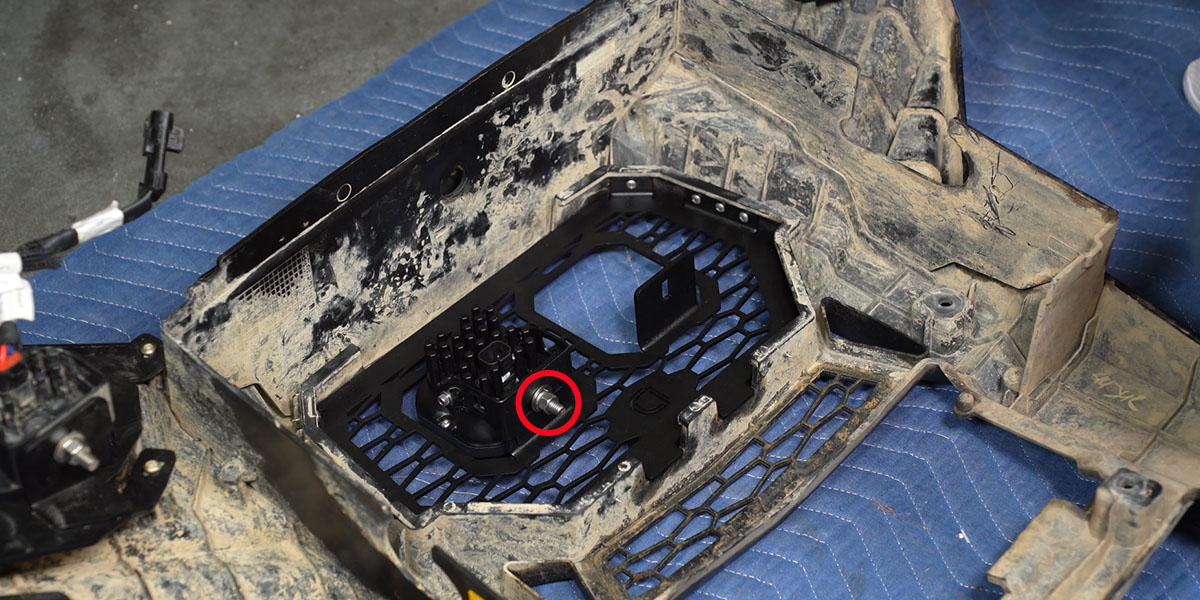
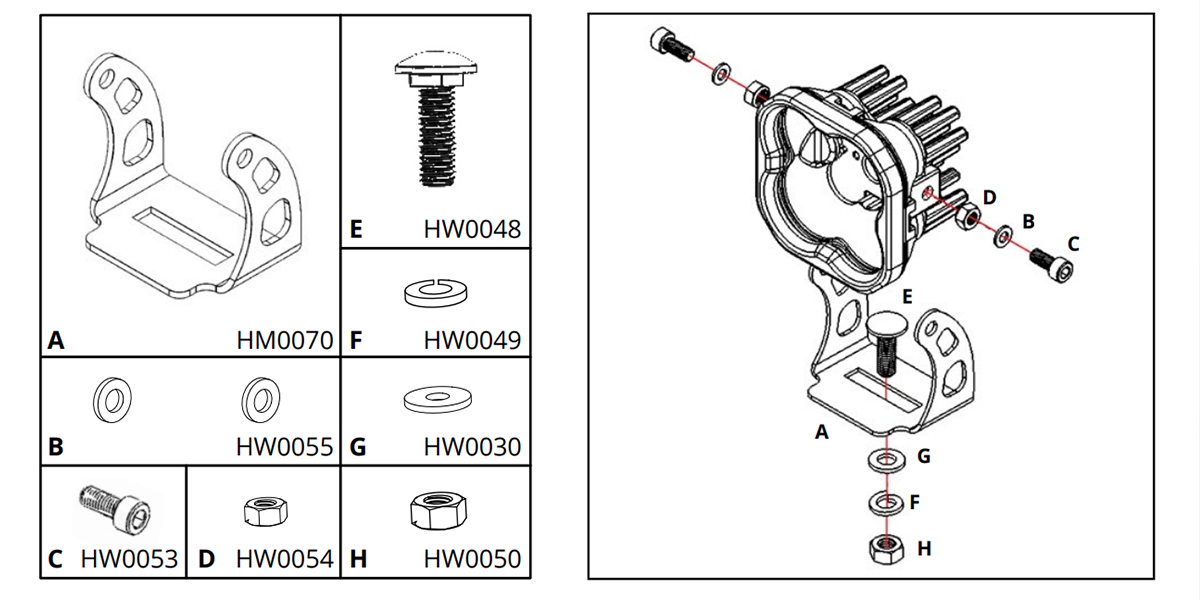
Step 3 — Mount the SS3 Pods
Assemble both SS3 pods per the included guide. Mount the pods to the grille using the included hardware — the SS3 brackets mount underneath the grille mounting tab.
Wiring Instructions
Step 4 — Mount the Relay and Route the Harness
Locate the factory bus bar on the passenger side firewall. Remove one T20 Torx bolt from the bus bar and mount the relay using the same bolt. Attach the positive lead to the first terminal with a 10mm socket and the ground lead to the 10mm bolt. Disconnect the switch portion of the harness, feed the main harness connector through the firewall grommet, and reconnect the switch. Mount the switch wherever you prefer.
Step 5 — Connect, Test, and Reassemble
Plug in the splitter harness to both SS3 pods, then plug the splitter into the main harness. Place the bumper back on the vehicle and secure with two T40 bolts. Test the function of the pods and aim as desired — tighten with a 10mm wrench and 5/32" Allen key. Reinstall the bumper and reassemble the rest of the RZR, zip-tying any loose wiring away from hot or moving parts. The install is complete.
Questions About the Install?
If you run into any issues during the installation, contact Ess K Customs — as an authorized Diode Dynamics dealer, we're here to help.
Shop RZR Lighting at Ess K Customs
Looking for lighting upgrades for your Polaris RZR XP? As an authorized Diode Dynamics dealer, Ess K Customs carries genuine products with full manufacturer warranty.
Browse RZR Grille Kits at Ess K Customs →
This install guide applies to Diode Dynamics SKUs: DD7854P, DD7855, DD7856, DD7857, DD7858, DD7859, DD7860, DD7861, DD7862