
The SAE/DOT Stage Series LED Light Bar Kit for the 2017–2020 Ford Raptor delivers a street-legal lighting upgrade that bolts directly to the factory front bumper. Vehicle-specific brackets use OEM mounting points for a clean, rattle-free install with no drilling or cutting. Here's the full walkthrough.
Watch the full install video below, or scroll down for the step-by-step written guide.

Table of Contents
- Installation Video
- Tools Required
- Installation Instructions
- Questions About the Install?
- Shop Ford Raptor Lightbar Kits at Ess K Customs
Installation Video
Tools Required
- T20 Torx bit
- 10mm socket
- Ratchet and extension
Time Required: Approximately 45 minutes to 1 hour.
Installation Instructions
Step 1 — Using a T20 Torx bit, remove the two factory screws from the lower bumper grille on one side of the vehicle.
Step 2 — Slide the LED light bar bracket into position behind the bumper opening. Align the bracket's mounting holes with the factory screw holes and reinstall the two T20 Torx screws removed in Step 1. Hand-tighten only for now.
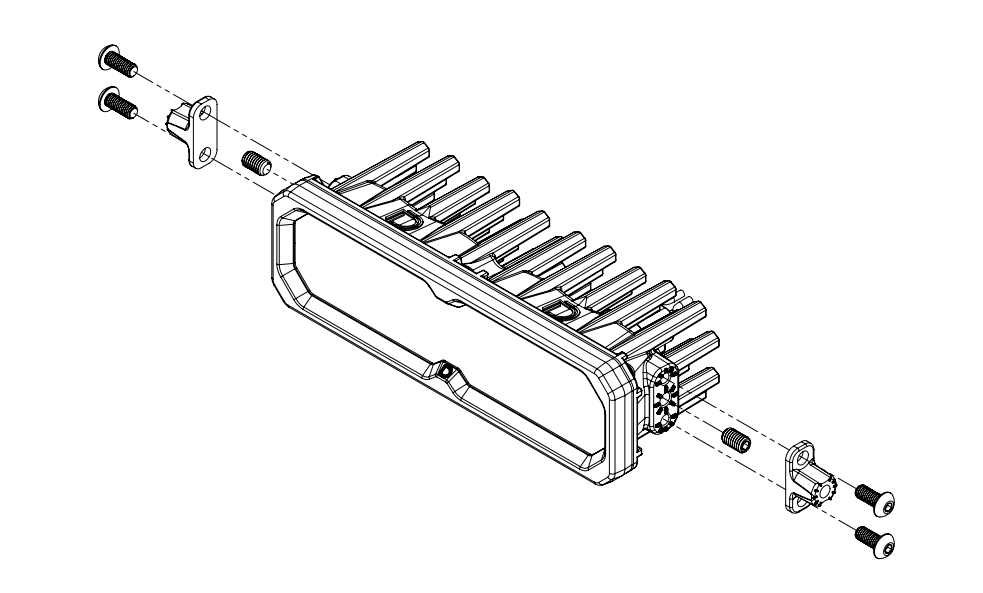
Step 3 — Attach the Stage Series LED light bar to the bracket using the included hardware and a 10mm socket. Adjust the light bar position so it sits centered in the bumper opening.
New Stage Series Lightbars — Mounting Adapter Bracket: If your kit includes a mounting adapter bracket, install it onto the lightbar before attaching it to the main brackets. Install the included set screws in the center mounting position on both sides of the lightbar, then secure the adapter using the included Torx screws in the top and bottom mounting holes. Once the adapter is locked in, use the supplied hex bolt to mount the lightbar to the main bracket as normal.
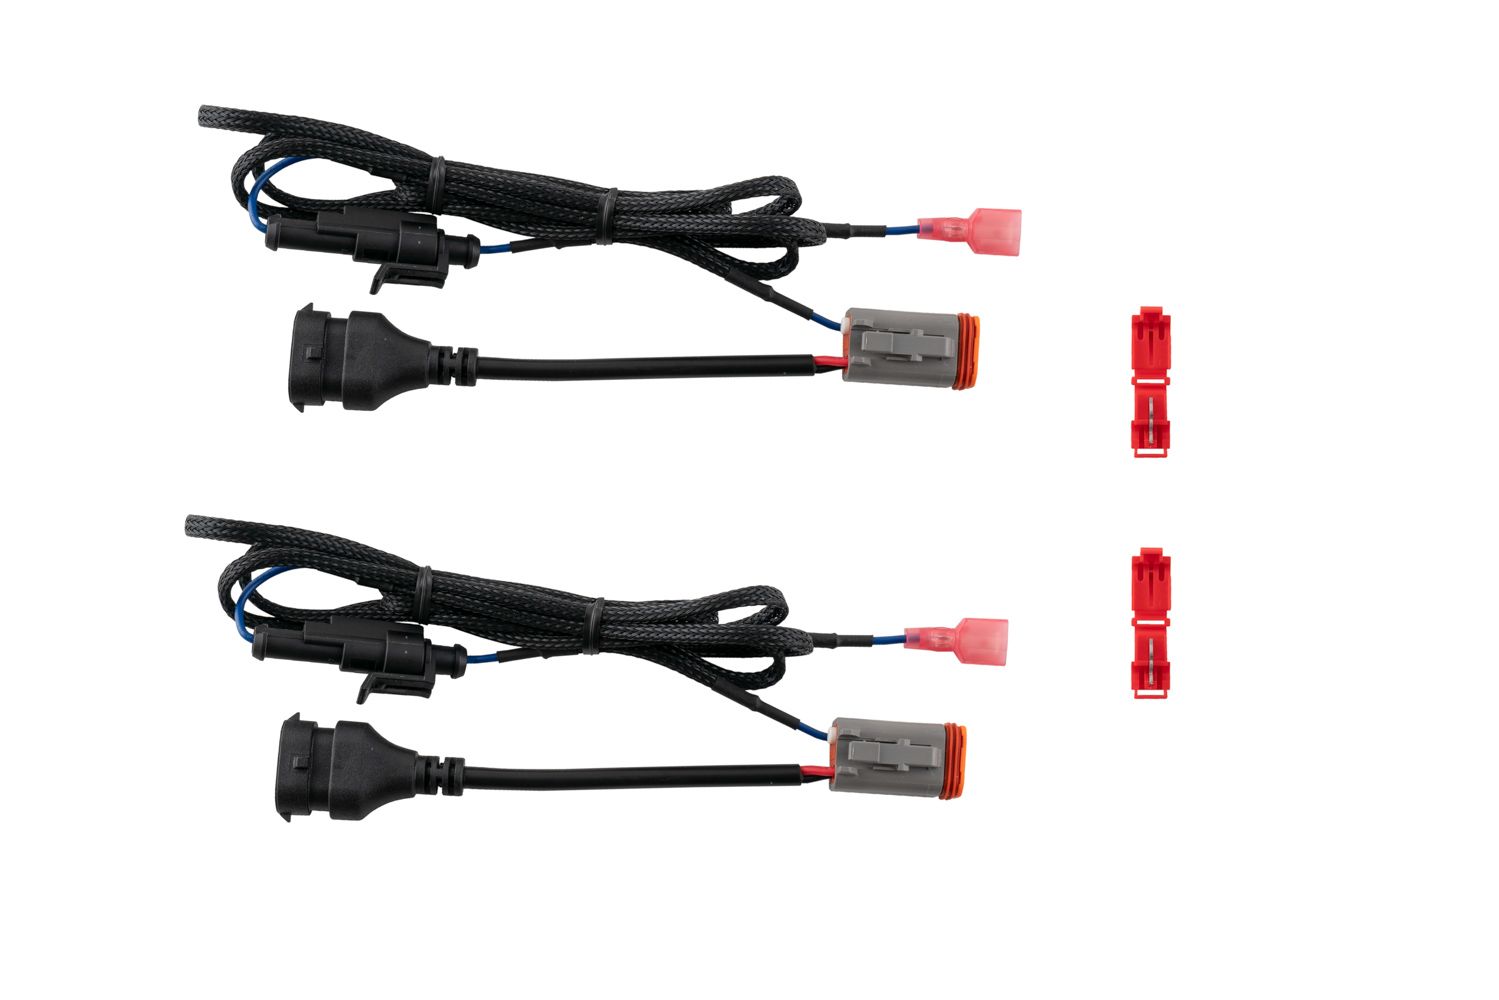
Connect Backlight Wire (Optional): New Stage Series Light Bars feature an integrated amber backlight that illuminates the TIR optic, creating a distinctive accent look while improving visibility when parked or stopped. If your light bar has the backlight function, connect the blue wire with the red male spade connector to a fused 12V source. The parking light or sidemarker circuit is commonly used so the backlight activates with your vehicle's exterior lighting.
Use the included T-taps to make the connection: position the T-tap over the selected wire, use needle-nose pliers to fully seat and crimp the tap, and insert the red male spade connector until secure.
NOTE: The power source must be fused. Do not connect the backlight wire directly to the vehicle battery.
Step 4 — Fully tighten all mounting hardware. Test the light bar and aim it to your desired position before final tightening. Repeat the entire process on the opposite side of the vehicle. Check your local laws and regulations for aiming, installation, and applicability. The install is complete.
Questions About the Install?
If you run into any issues during the installation, contact Ess K Customs — as an authorized Diode Dynamics dealer, we're here to help.
Shop Ford Raptor Lightbar Kits at Ess K Customs
Ready to upgrade your Raptor with an SAE/DOT LED Light Bar Kit? As an authorized Diode Dynamics dealer, Ess K Customs carries genuine products with full manufacturer warranty.
Shop SAE/DOT Stage Series LED Light Bar Kit for 2017-2020 Ford Raptor →
This install guide applies to Diode Dynamics SKUs: DD6006, DD6004, DD6217, DD6005